.png)


Sign in to your XDA account
For those who like to host their own services on a home server, it can be difficult to choose the most convenient way to access all of your services when you're travelling. Some people opt to expose their services to the wider internet and use a tool like Authelia or Authentik to gain access, while others rely on the built-in protections individual applications have. I'd rather not expose any of my services to the internet, and the latter is a rather insecure way of doing it. Your best option by far is to use a VPN like WireGuard, or a WireGuard-based mesh system like Tailscale or Pangolin.
In my case, I use Tailscale, and I'll walk you through my particular setup and how I make it work for me. I use the official Tailscale servers for authentication rather than Headscale, but if you want to craft your own entirely self-hosted access method, Pangolin or Tailscale with Headscale are powerful alternatives that will also do the job. In my case, I also use a domain with a reverse proxy, though you can just as easily use the direct IP addresses of devices in your Tailnet if you'd prefer.

Prerequisites
A VPN is the bare minimum
The only completely necessary component that you'll need is a VPN. You can host your own WireGuard server with a tool like wg-easy, and you can also host a WireGuard or OpenVPN server on many different router platforms like OPNsense, pfSense, or dd-wrt. The best option will depend entirely on what is available to you, and I used to use a simple WireGuard profile, created through wg-easy, with a Dynamic DNS (DDNS) configured via DuckDNS for connecting while I was away. As many consumer IP addresses are rotated on a set time period, a DDNS service allows you to configure an application on your server or router to continuously poll for IP changes, and when your IP changes, it can update the DNS to point to your new IP address.
This worked well, but I wanted better. I already had a domain that I could use, and I had changed its name servers to Cloudflare's. While you could also use DDNS to update specific subdomains to point to your home IP address and capture those requests with a reverse proxy, this means that you're exposing services to the wider internet, which is an unnecessary risk to take, even if it's convenient. Using Tailscale, I've combined the best of both worlds, where I can go to a specific subdomain on my website, access my self-hosted service, and still not expose it to the wider internet.
The reverse proxy that I use is Caddy, but you can also use a tool like Nginx Proxy Manager if you would prefer a GUI alternative. Then, I enrolled my servers in my Tailnet, and by adding the particular Tailscale IP to Cloudflare as an A record for a subdomain, I can access individual services using regular web addresses. While Tailscale also tries to attempt a direct connection first before using its relay servers for connectivity, I have also created local DNS records using a Pi-hole to ensure that my connections are direct when I'm on the same network, and my services are still accessible over SSL even if Tailscale is switched off.
I'll walk you through how I configure my network for convenient and secure remote access, and it might inspire you to do something similar!
Setting up a Tailscale network
The instructions will depend on your configuration
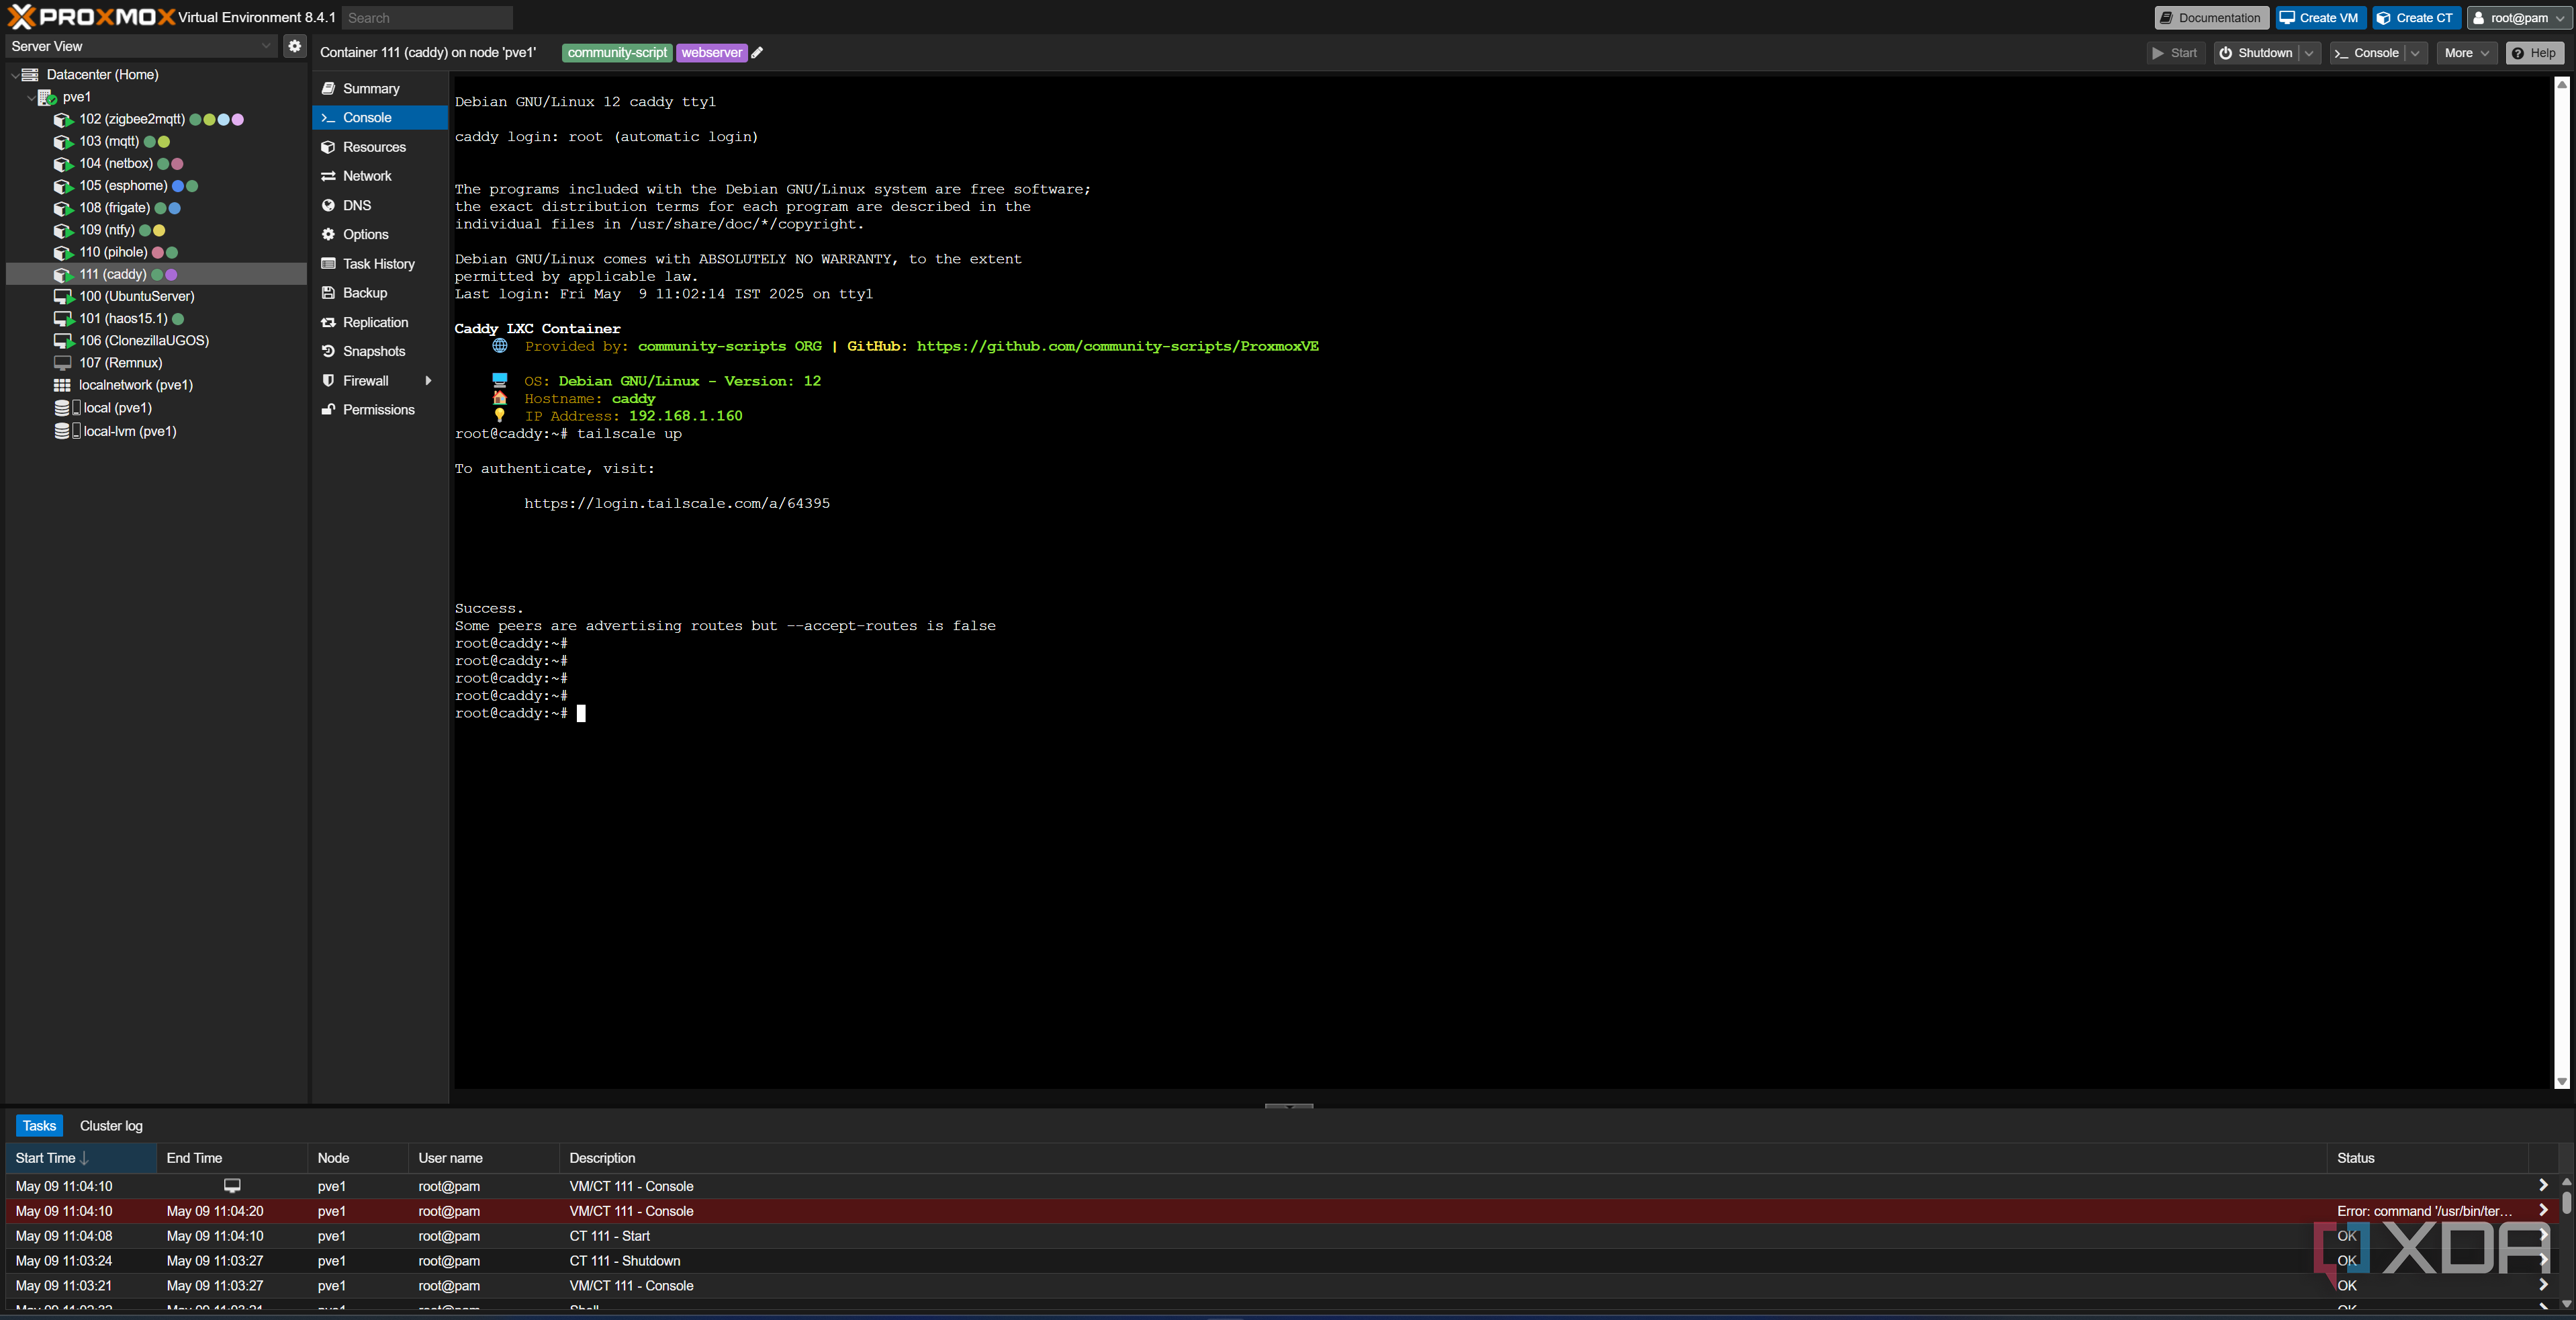
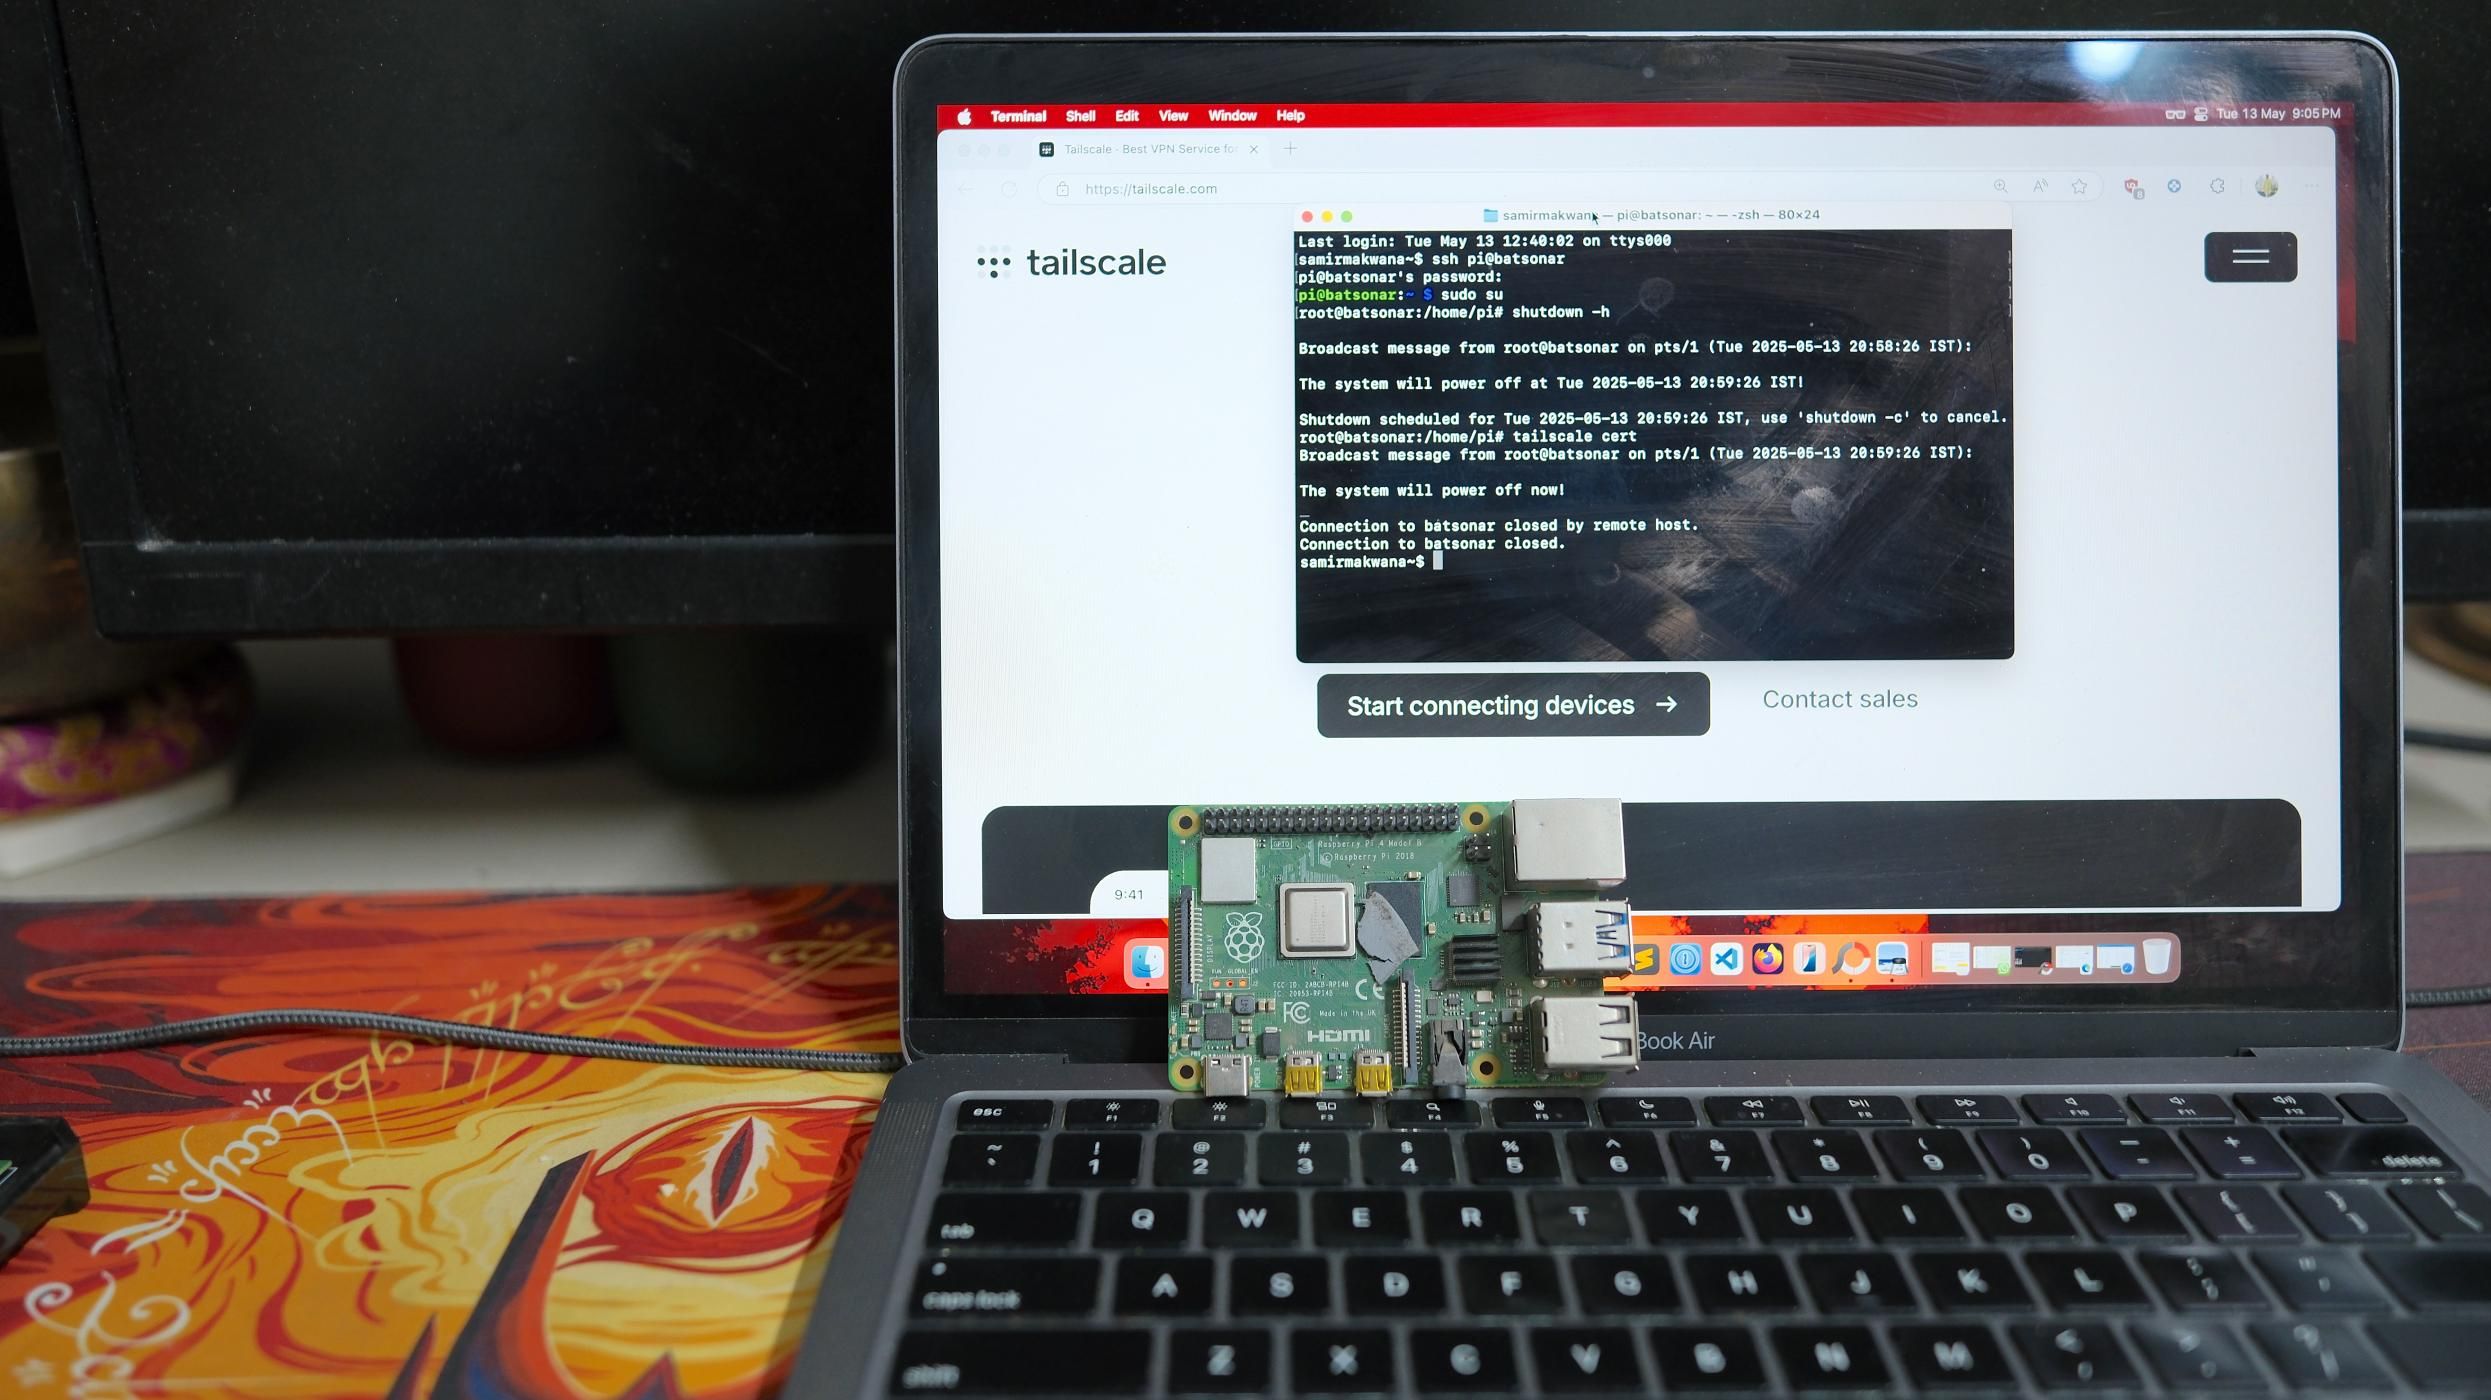
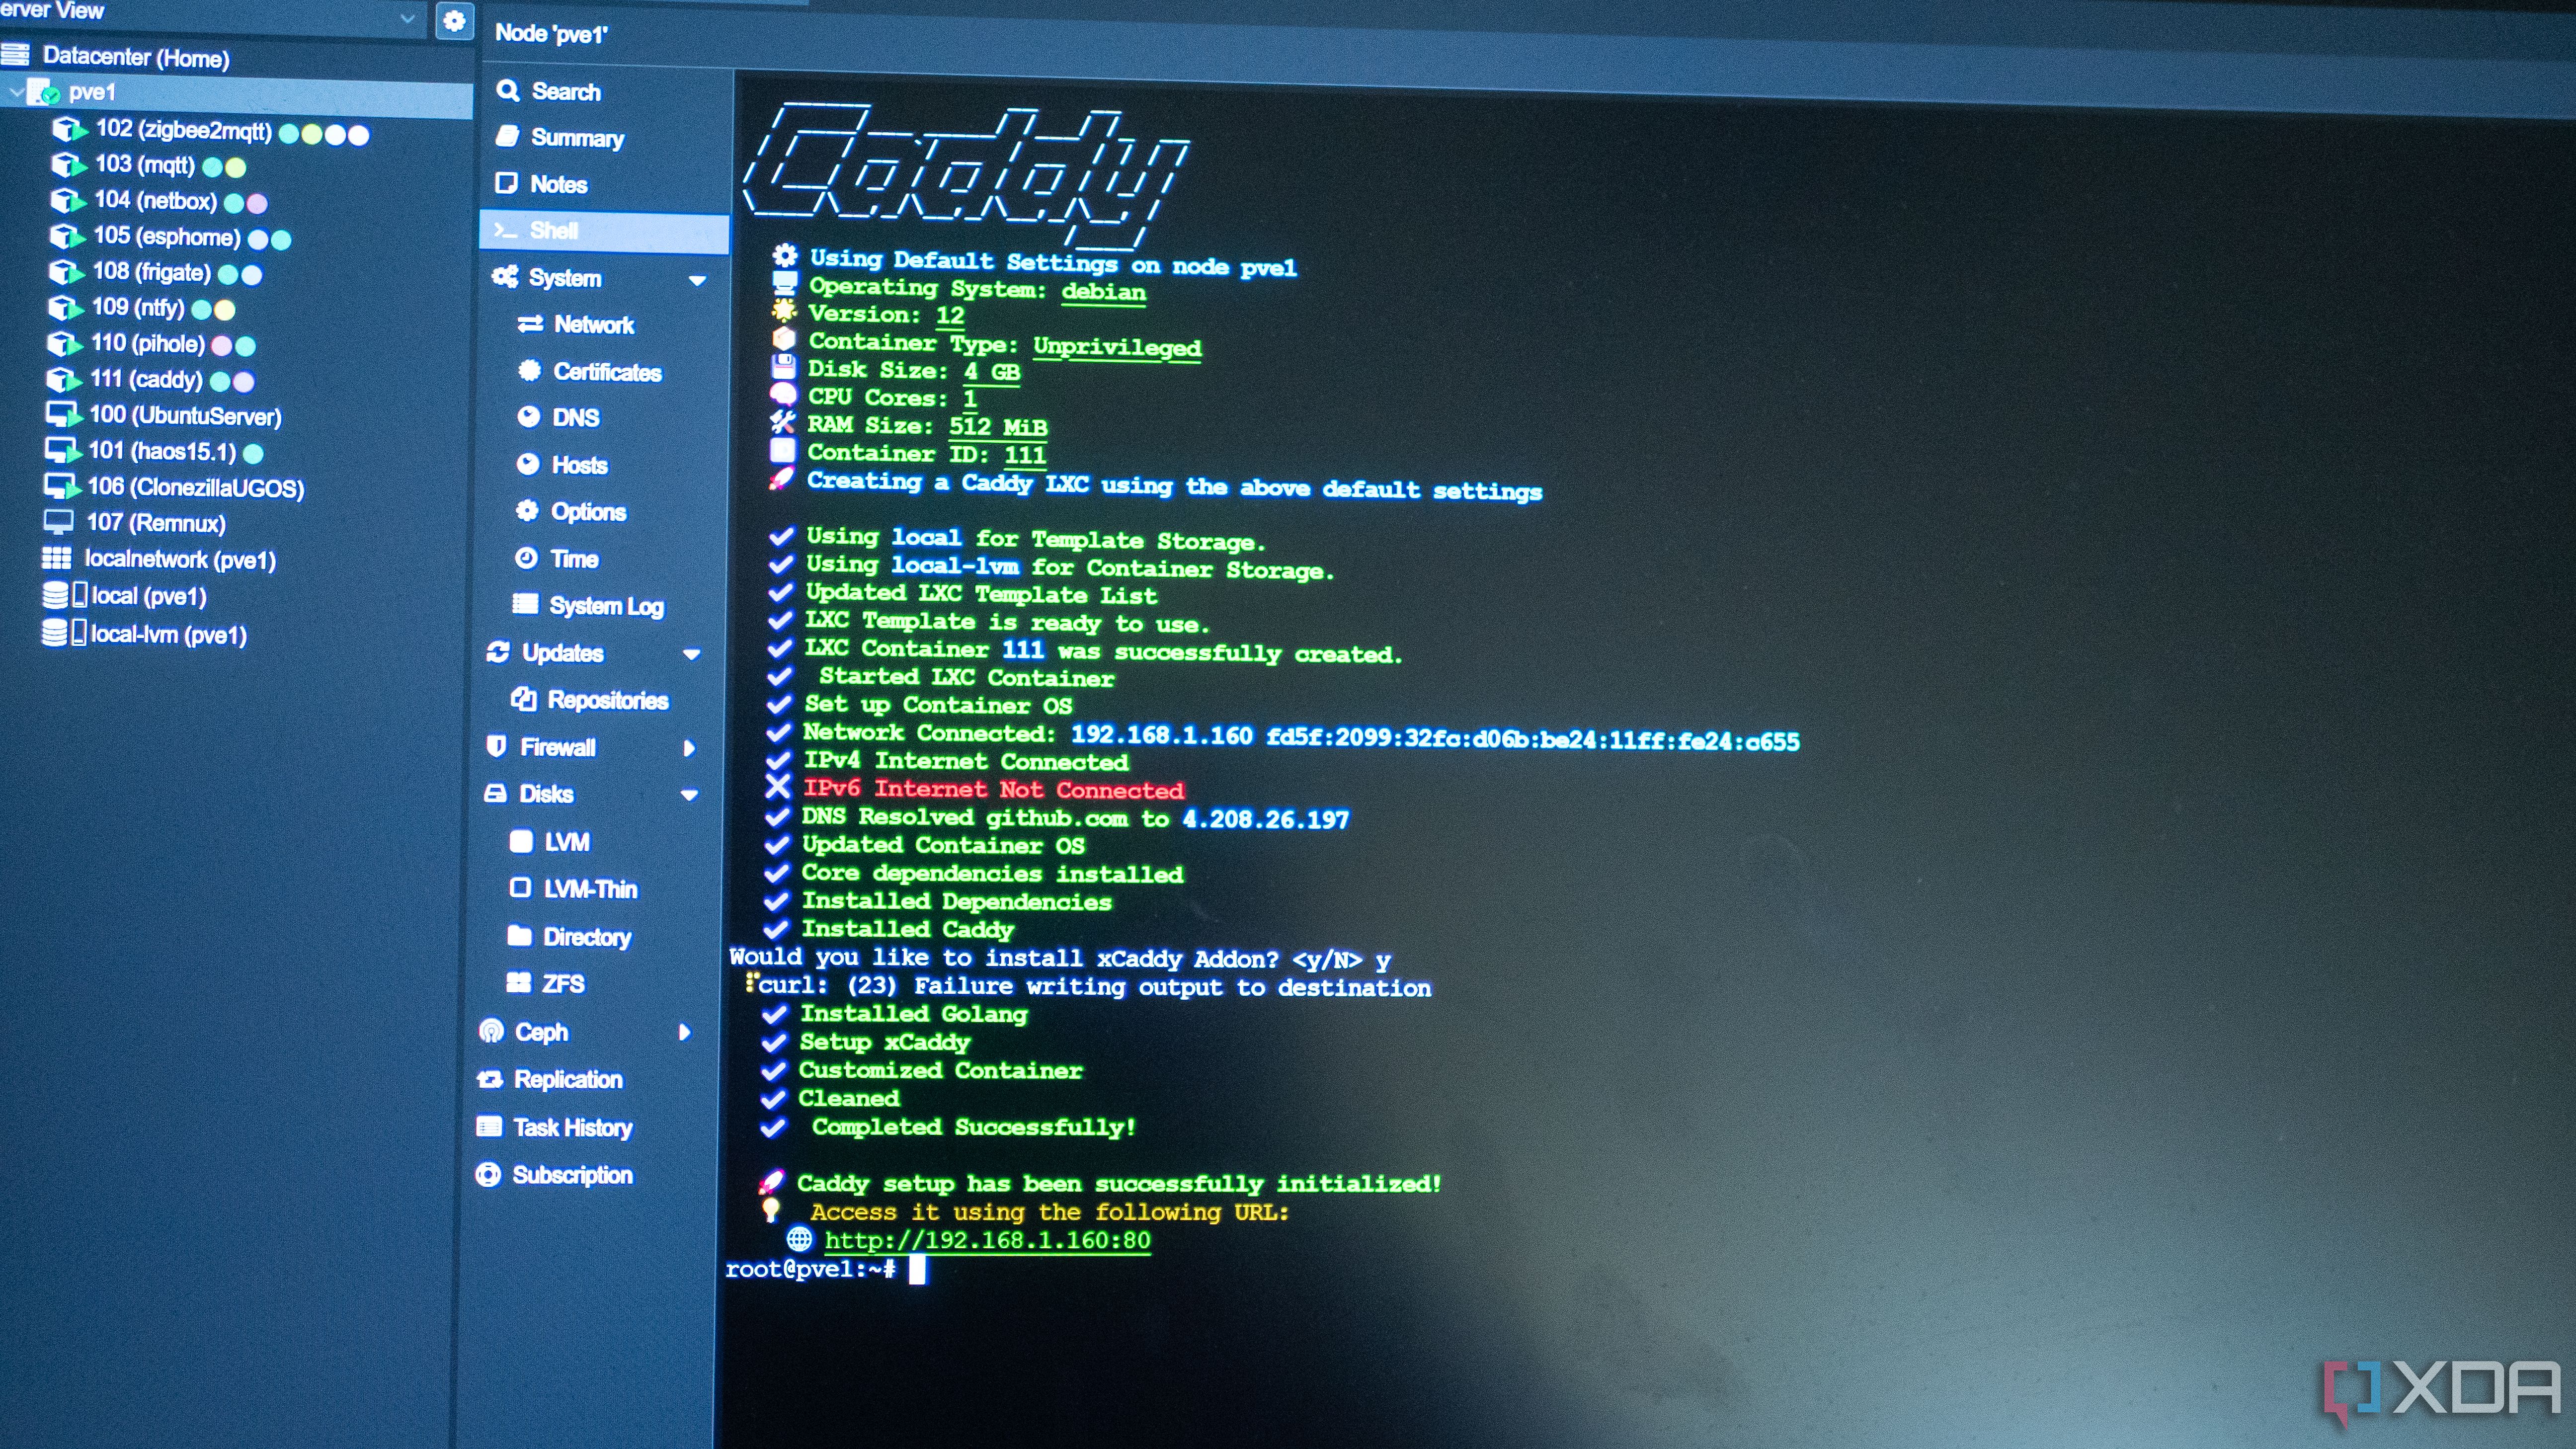
Your Tailscale network, called a Tailnet, is made up of all of the devices connected to it. You'll need to register a Tailscale account, then log in with each of them individually. In my case, my Caddy reverse proxy lives in an LXC on my smaller, Proxmox-based host, with /dev/tun passed through and Tailscale installed inside of it so that it identifies as its own device in my Tailnet. I also have Tailscale installed on my TrueNAS machine, which is where most of my self-hosted services live, and it uses the host network so that Tailscale encompasses the entire machine.
Next, I log in to Tailscale on any of the devices I intend to use to access my network, such as my laptop, my phone, and my computer. The free tier of Tailscale allows for 100 devices and three users, which is more than enough for most people. Once all of my devices are enrolled, I log back in to the Tailscale web UI to note down the IP address of my reverse proxy service, Caddy. This will look something like 100.45.100.22, which is an IP address from the shared address space known as CGNAT. These are special-use IP addresses that are not exposed to the public internet and will only be accessible when connected to your Tailnet. If you're using Nginx Proxy Manager on TrueNAS, then the IP you'll want to take note of is the one belonging to your TrueNAS machine.
If you intend to add other users to your Tailnet as well, you may want to take a look at the access controls section of Tailscale. This section allows you to define what users can access what devices, and by default, will allow everyone to access everything. If you are the only user in your Tailnet, then you don't need to change the default behavior. Otherwise, you may wish to look at the syntax guide on the right of the page to determine how best you would like to limit other users in your Tailnet.
Once all of your services are connected and ready to go, we can move on to configuring our access so that we can use our domain!
Creating our subdomains
I like using Cloudflare for this
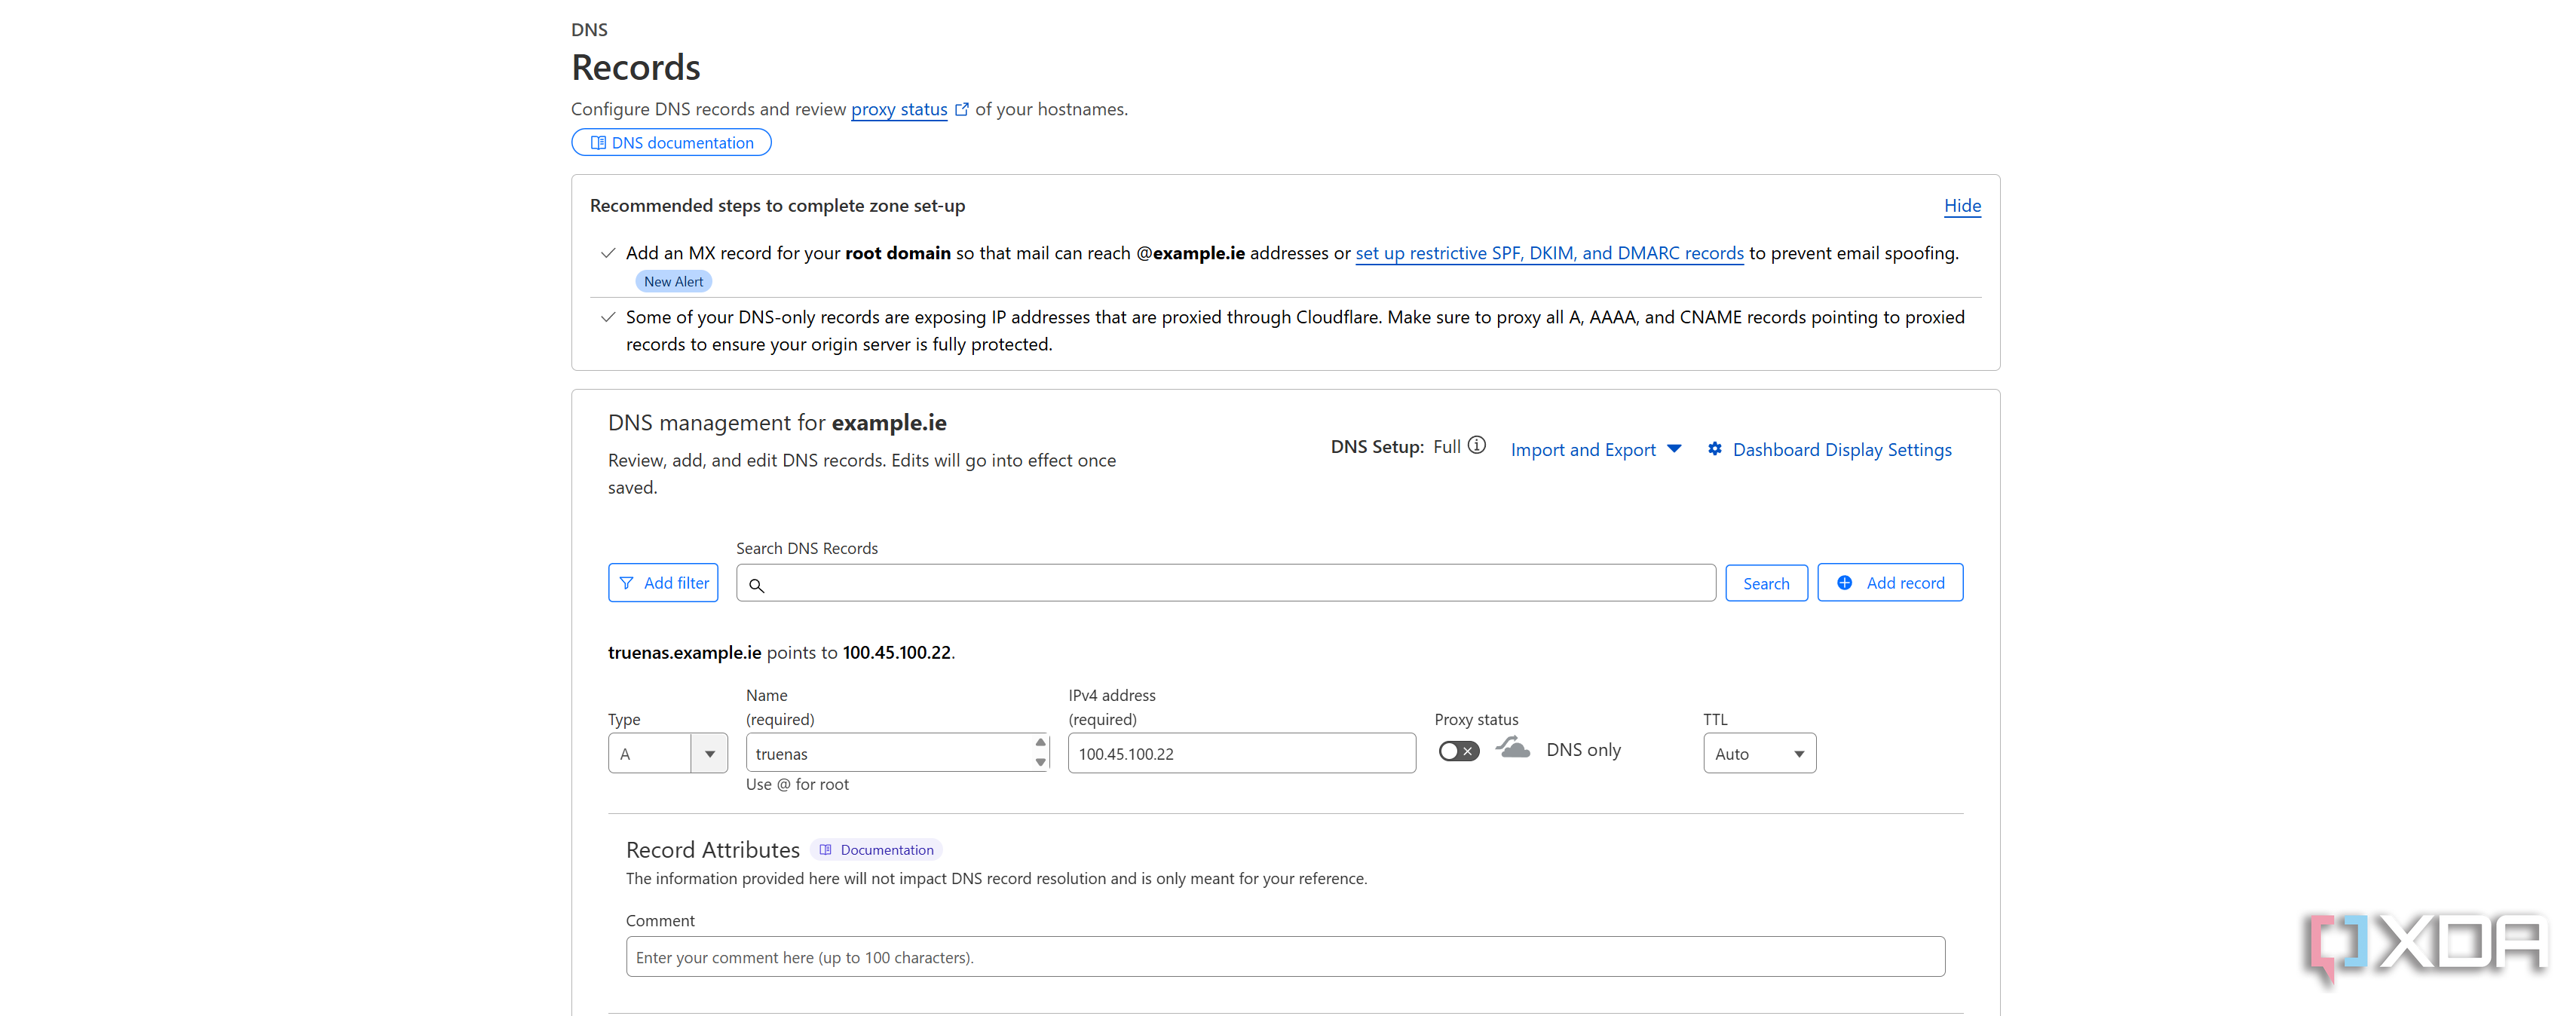
As already mentioned, we'll be using Cloudflare for this, as it's the most convenient method that I've found while also offering different tools to secure your network. We'll create a basic TrueNAS subdomain first by creating a new A record and entering the name as "truenas". The IPv4 address will be our reverse proxy Tailscale IP address, and we'll set the proxy status to off. This is because Cloudflare isn't a part of your Tailnet and therefore cannot access the private Tailscale IP address, and won't be able to proxy the connection to the host. That also means nobody else can access it either. Now click save, and in a few minutes, your browser will be able to recognize the request to that address, and should bring you to the default Caddy or Nginx landing page when you have the Tailscale VPN switched on.
Now that we've created one subdomain, create some more for a few services that you would like to access. I can access my Immich, Nextcloud, Blinko, Obsidian, and Jellyfin instances remotely with this method, and you may want to add some more. It's the same process for each one; create a new A record, choose the subdomain, and set the IP address to your reverse proxy Tailscale IP address with proxying set to off.
The next part is the hardest part, as we'll be configuring automatic SSL certificates using Cloudflare and Caddy that will be recognized and accepted by any device that joins our Tailnet.
Related
Configuring Caddy as a reverse proxy and getting SSL certificates
Adding Cloudflare support and supporting HTTPS

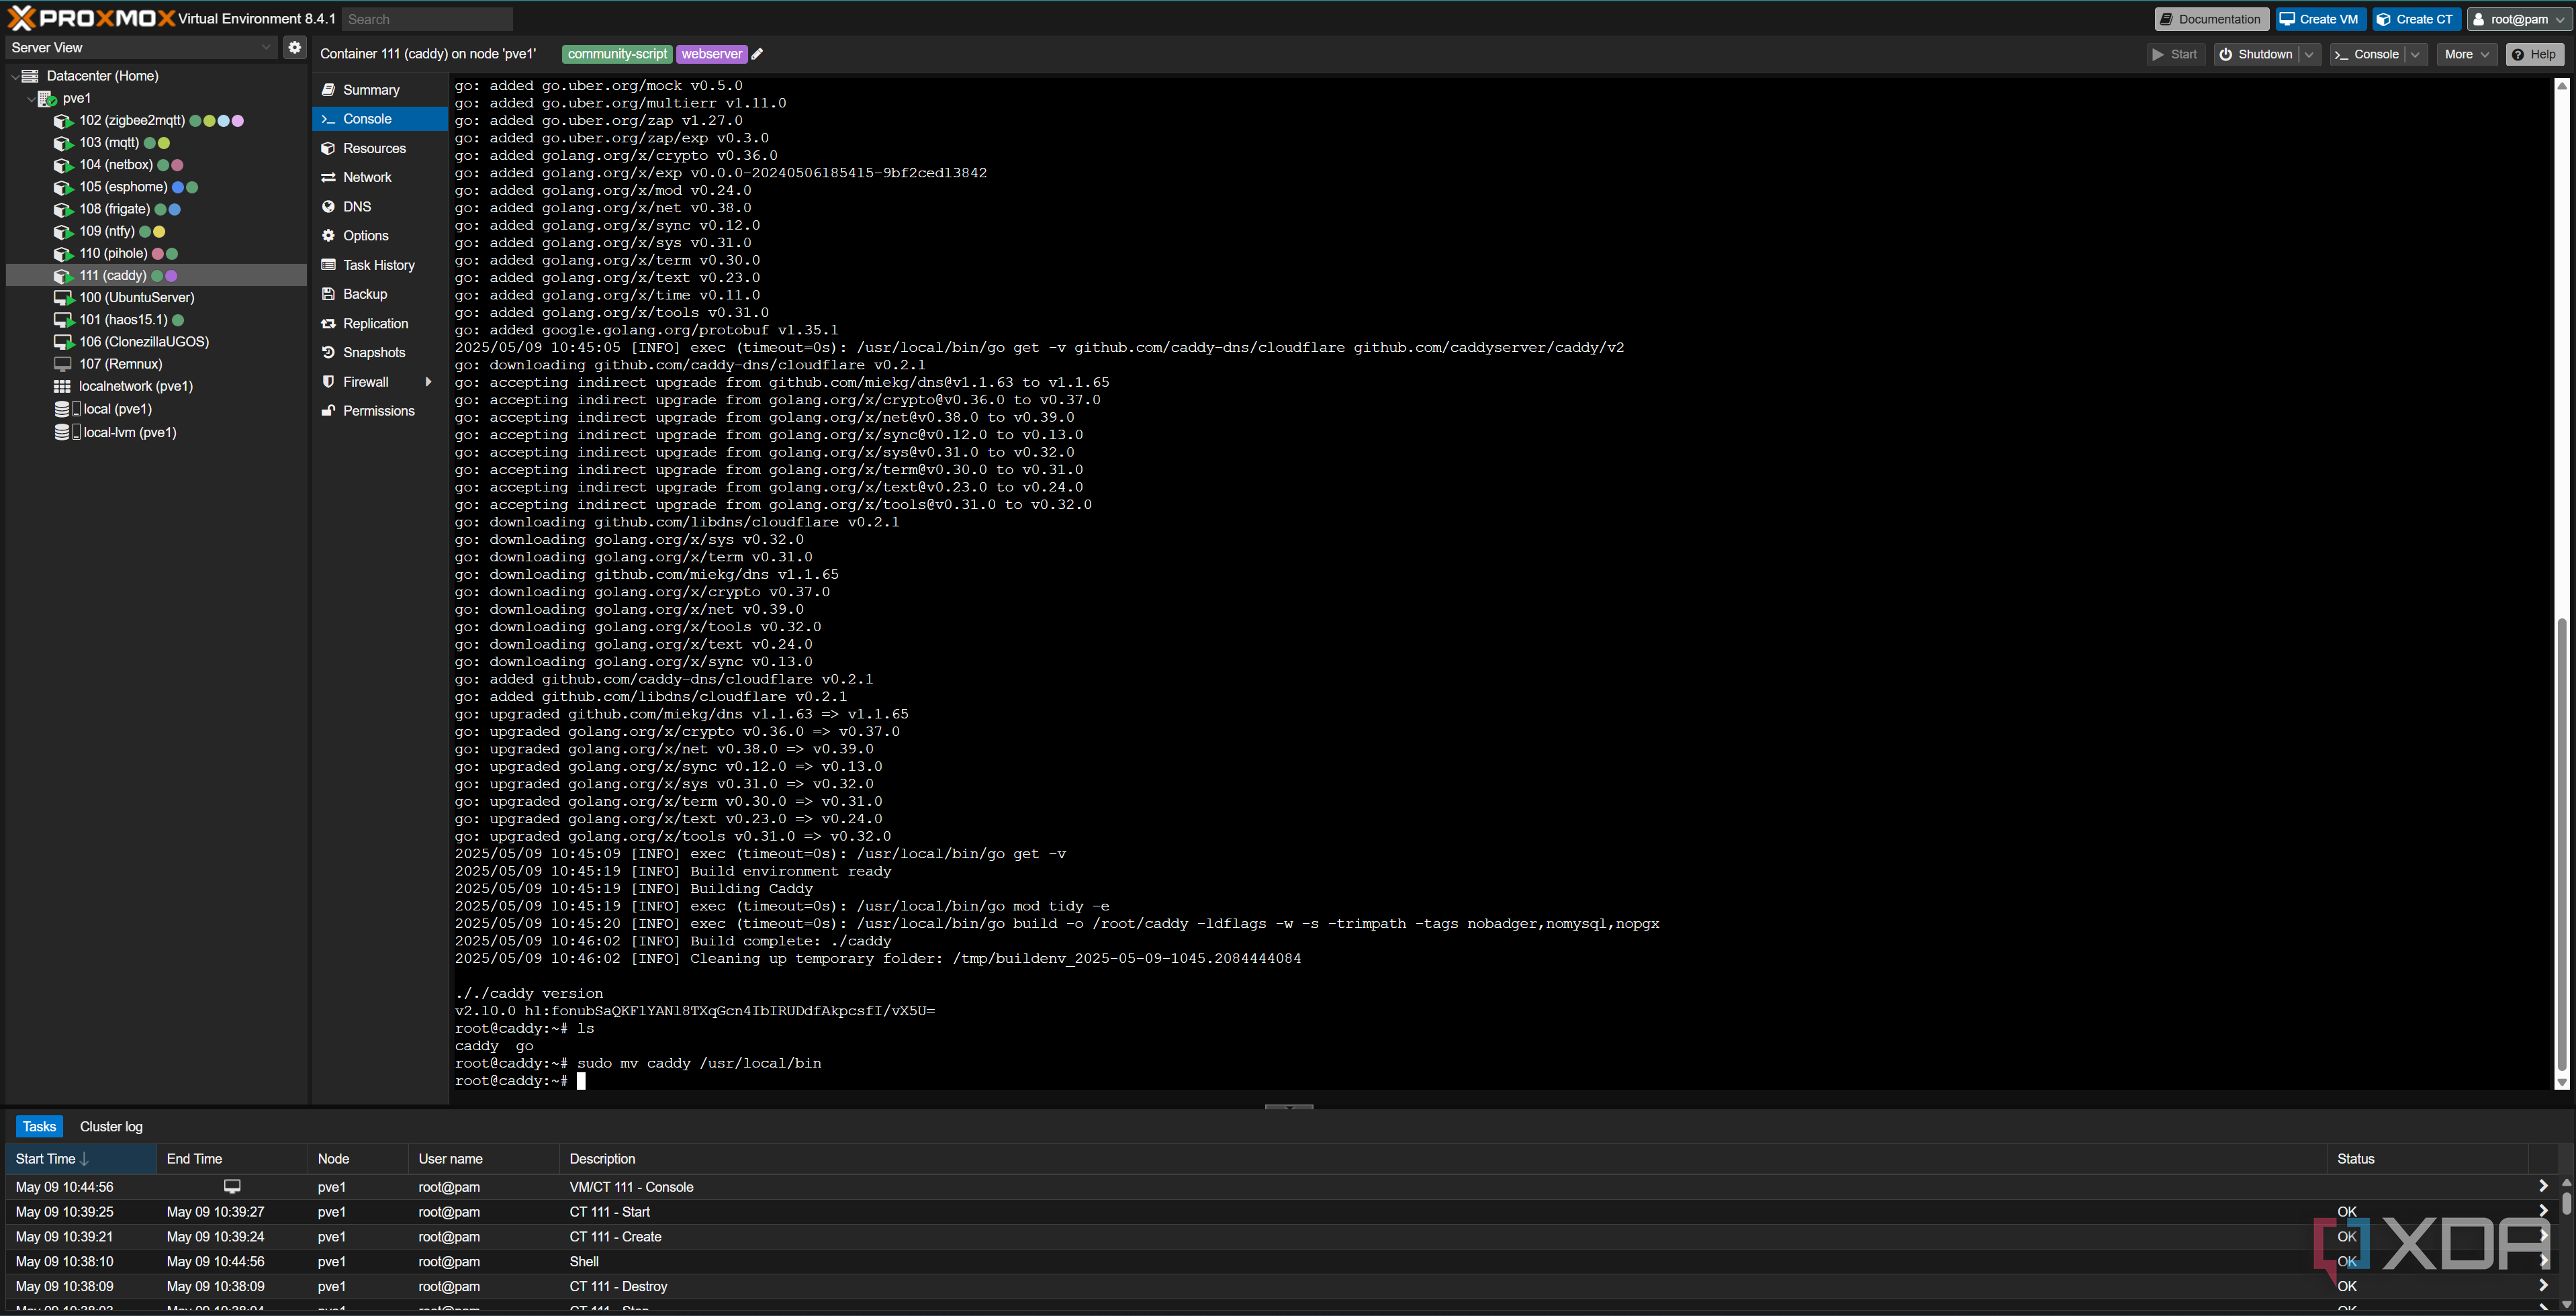
Caddy uses "modules" to expand on its functionality, and out of the box, it doesn't support Cloudflare. There are two ways you can go about adding support, though. The first, and the way I did it, was by using xcaddy. This tool can build Caddy with modules (plugins, basically), and if the term "build" scares you, it's actually really, really easy. The command for building Caddy with Cloudflare support is simply the following:
xcaddy build --with github.com/caddy-dns/cloudflareThis creates a new "caddy" file that you can use to replace the "caddy" binary in /usr/bin, and we can then configure it to use Cloudflare as proof of ownership of the domain when requesting SSL certificates. If you'd rather not go through the trouble of building with xcaddy, you can download a pre-built Caddy binary with the Cloudflare module already installed. With either method, Caddy updates will still work (invoked through "caddy upgrade") and will recognize the custom module and ensure that it's included in the update process.
Next, we'll need to get a token from Cloudflare that allows you to modify DNS records via the Cloudflare API. You can find this in your Cloudflare profile, under API Tokens. Create a new API token using the "Edit zone DNS" template, and under zone resources, select your domain name. Everything else can remain the same, and you can click Continue to summary, issue the token, and then save a copy of the token for later usage. This is the only time Cloudflare will show you it, so make sure you can access it when you need it.
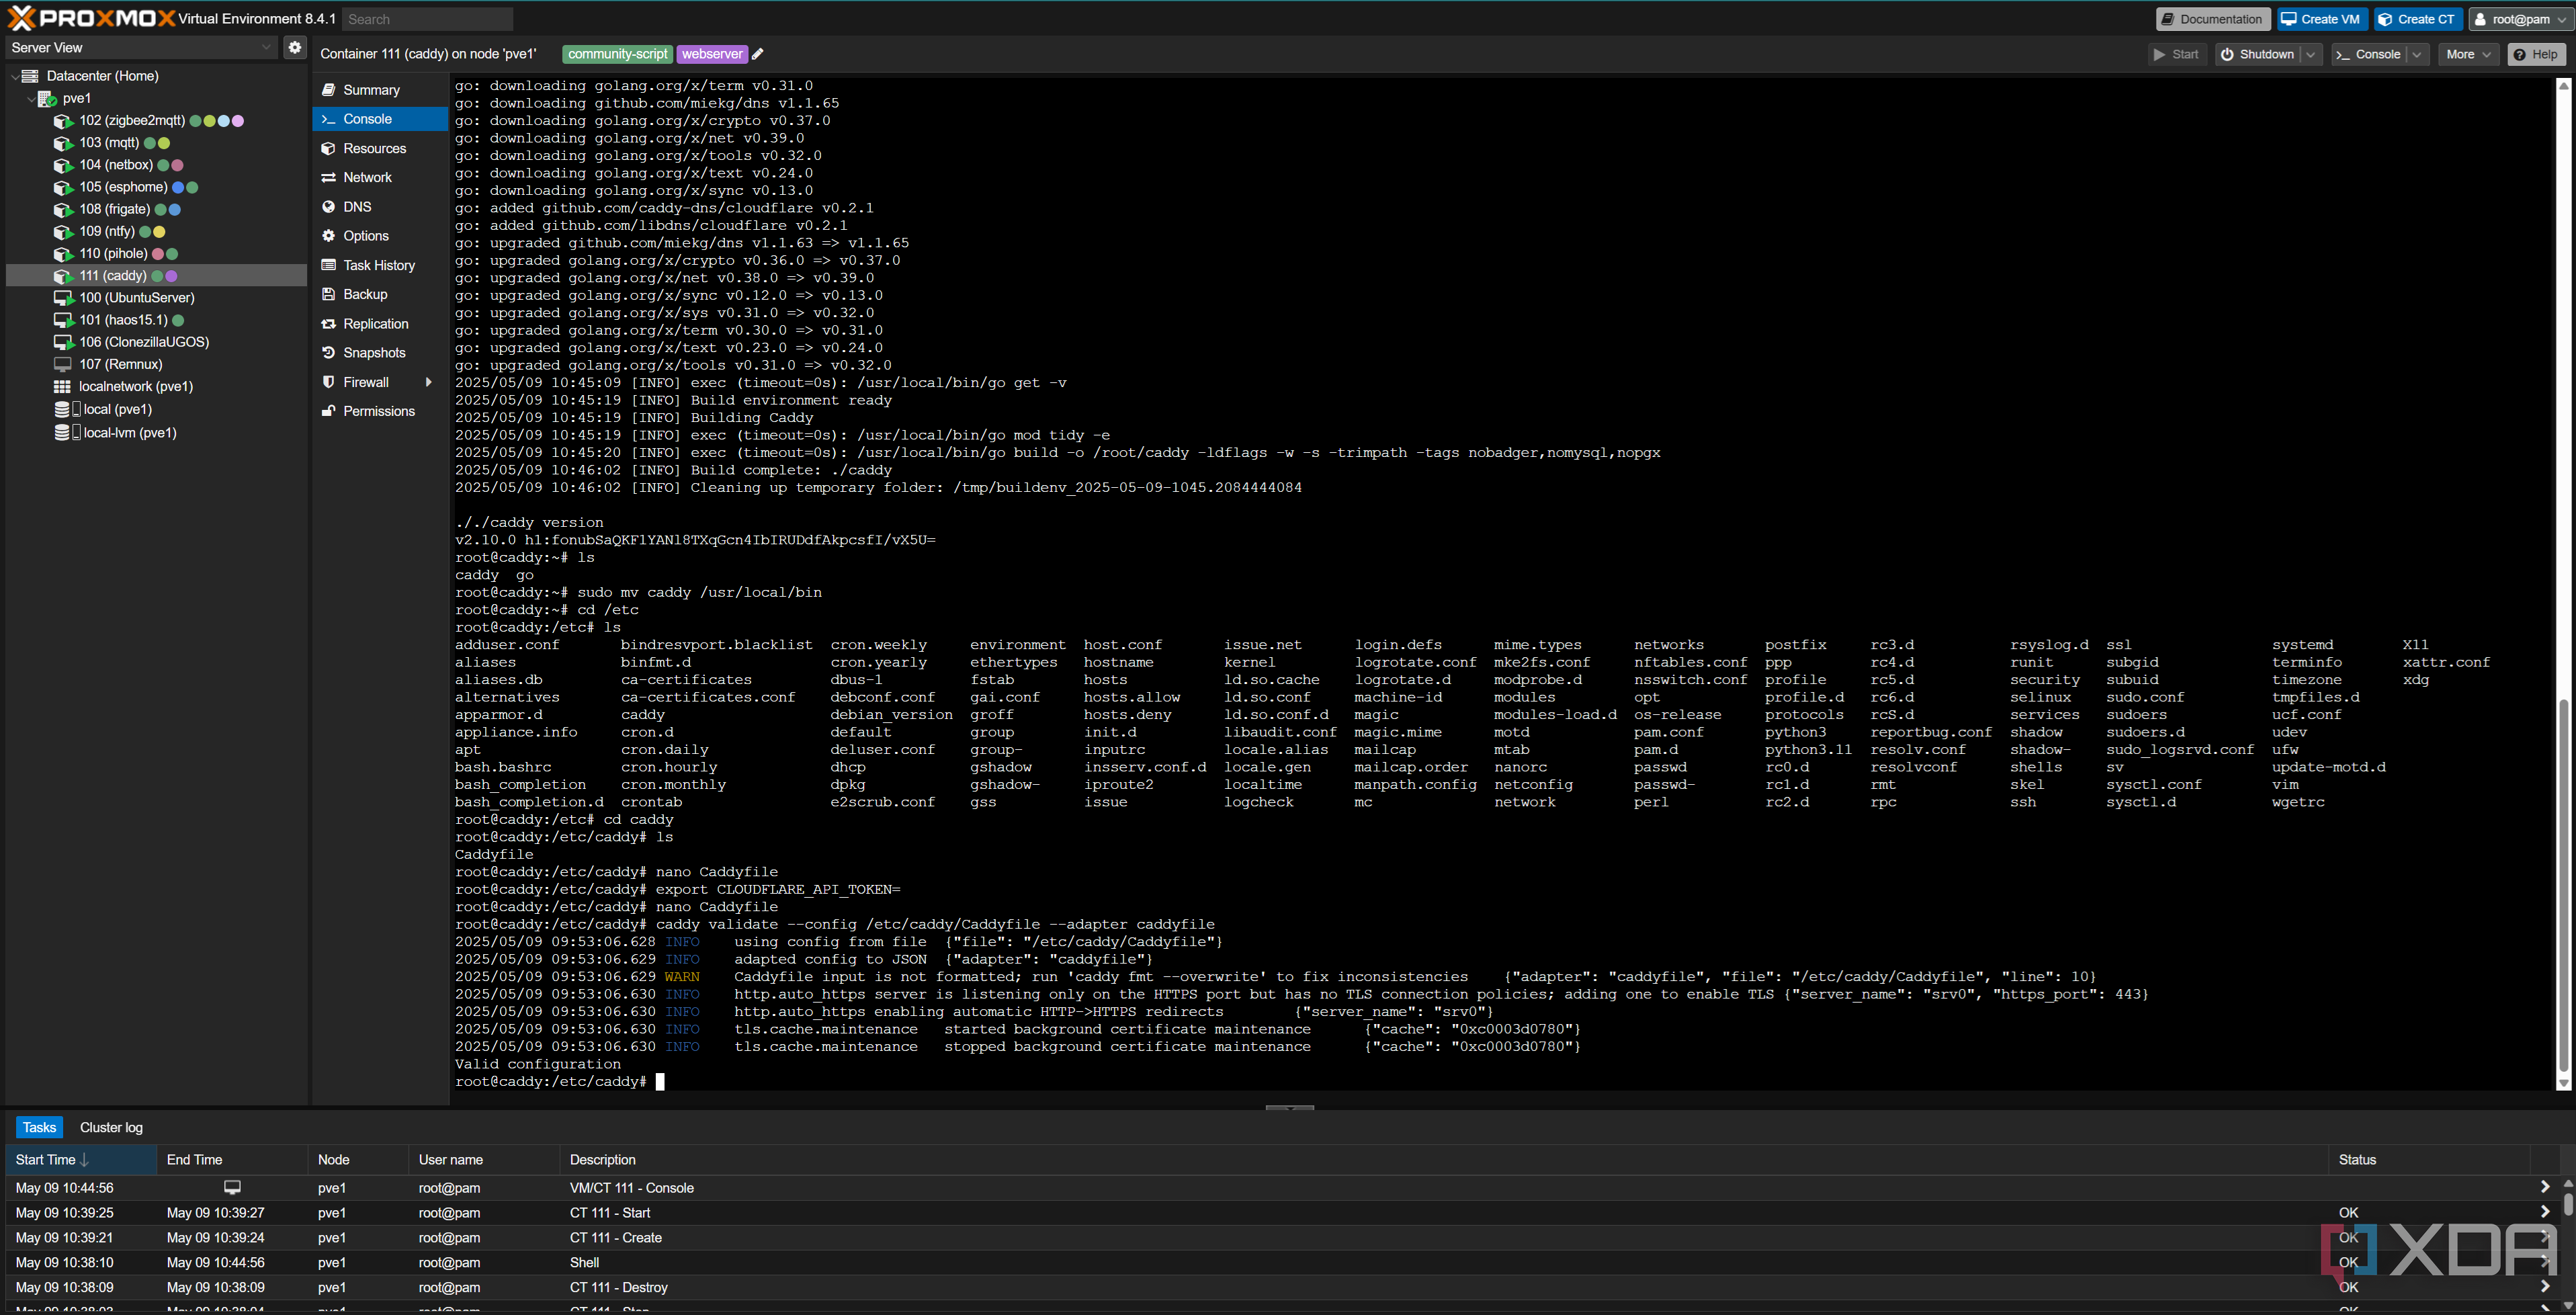
Moving back to Caddy, type the following command:
cd /etc/caddyYou will now be in the Caddy folder, where "Caddyfile" lives. This file contains all of the information needed to build our reverse proxies. If it's not already there, don't worry. We can create it, but we can also create a Caddyfile anywhere for later usage. Your container might have already created it, but if it didn't, feel free to make your Caddyfile anywhere easily accessible.
For now, run the following command:
export CLOUDFLARE_API_TOKEN=This will place the Cloudflare API token in your system's environment variables. Now, type the following command:
nano CaddyfileThe above command depends on whether Nano is installed or not. If it isn't, you can use another text editor.
We'll first need to configure Cloudflare DNS challenges. Because the service won't be publicly accessible, Caddy will instead prove ownership of the domain to Let's Encrypt, the certificate provider, by modifying a TXT record associated with the domain. Add the following your Caddyfile:
{# E-mail that Let’s Encrypt will use for expiry notices
email [email protected]
# All ACME interactions use Cloudflare DNS-01 with the token from env-var
acme_dns cloudflare {env.CLOUDFLARE_API_TOKEN}
}
This tells Let's Encrypt to use your email address for future contact, and uses the variable that we exported earlier to our environment variables for authentication. Now we can create a reverse proxy to our TrueNAS domain that we created earlier, under truenas.example.ie. In the same file, add the following (after the last curly bracket)
truenas.example.ie {reverse_proxy http://192.168.1.5:81
}
Replace the domain with your actual domain, and the reverse proxy address with the true internal network address of your TrueNAS machine. You can then copy that method for all of the other subdomains that you created. In most cases, that will be enough information, but sometimes you'll need to add additional parameters too. For example, to access my Proxmox web GUI, this is my configuration:
pve1.example.ie {reverse_proxy https://192.168.1.6:8006 {
transport http {
tls_insecure_skip_verify
keepalive 60s
}
header_up Host {host}
header_up X-Real-IP {remote_host}
header_up X-Forwarded-For {remote_host}
header_up X-Forwarded-Proto {scheme}
header_up Upgrade {http.request.header.Upgrade}
header_up Connection {http.request.header.Connection}
}
}
Your needs will differ depending on the services that you use and what you want to access. The above for Proxmox allows for websockets to work (so that noVNC can be used to see the consoles of services), and also ignores the self-signed certificate error thrown by Caddy when it encounters the Proxmox login page.
Finally, run the following command:
caddy run --config /etc/caddy/CaddyfileIf your Caddyfile is in another location, then change the path in the above command to match it. Caddy will now execute a DNS challenge for all of your subdomains, proving ownership via Cloudflare and requesting a legitimate SSL certificate. Assuming no errors, you will now be able to access your self-hosted services when the Tailscale VPN is enabled.
How this works is pretty simple: you can't access the Tailscale IP when you're not connected to the Tailscale VPN, so when Cloudflare tells your browser to go to the associated IP address, your browser can't see anything. With Tailscale switched on, it can then get through, and Caddy sees that the request originated from "truenas.example.ie". It knows you want to see your TrueNAS UI, so it opens a reverse proxy connection to that particular service and serves it to you. Nothing is exposed to the wider internet, yet you get all of the convenience as if it were. Plus, you even get valid SSL certificates, so no annoying warnings about self-signed certificates, and services that require it for some functions, such as Home Assistant, will work perfectly.
Related
Adding an override for local access
A nice-to-have affirmation
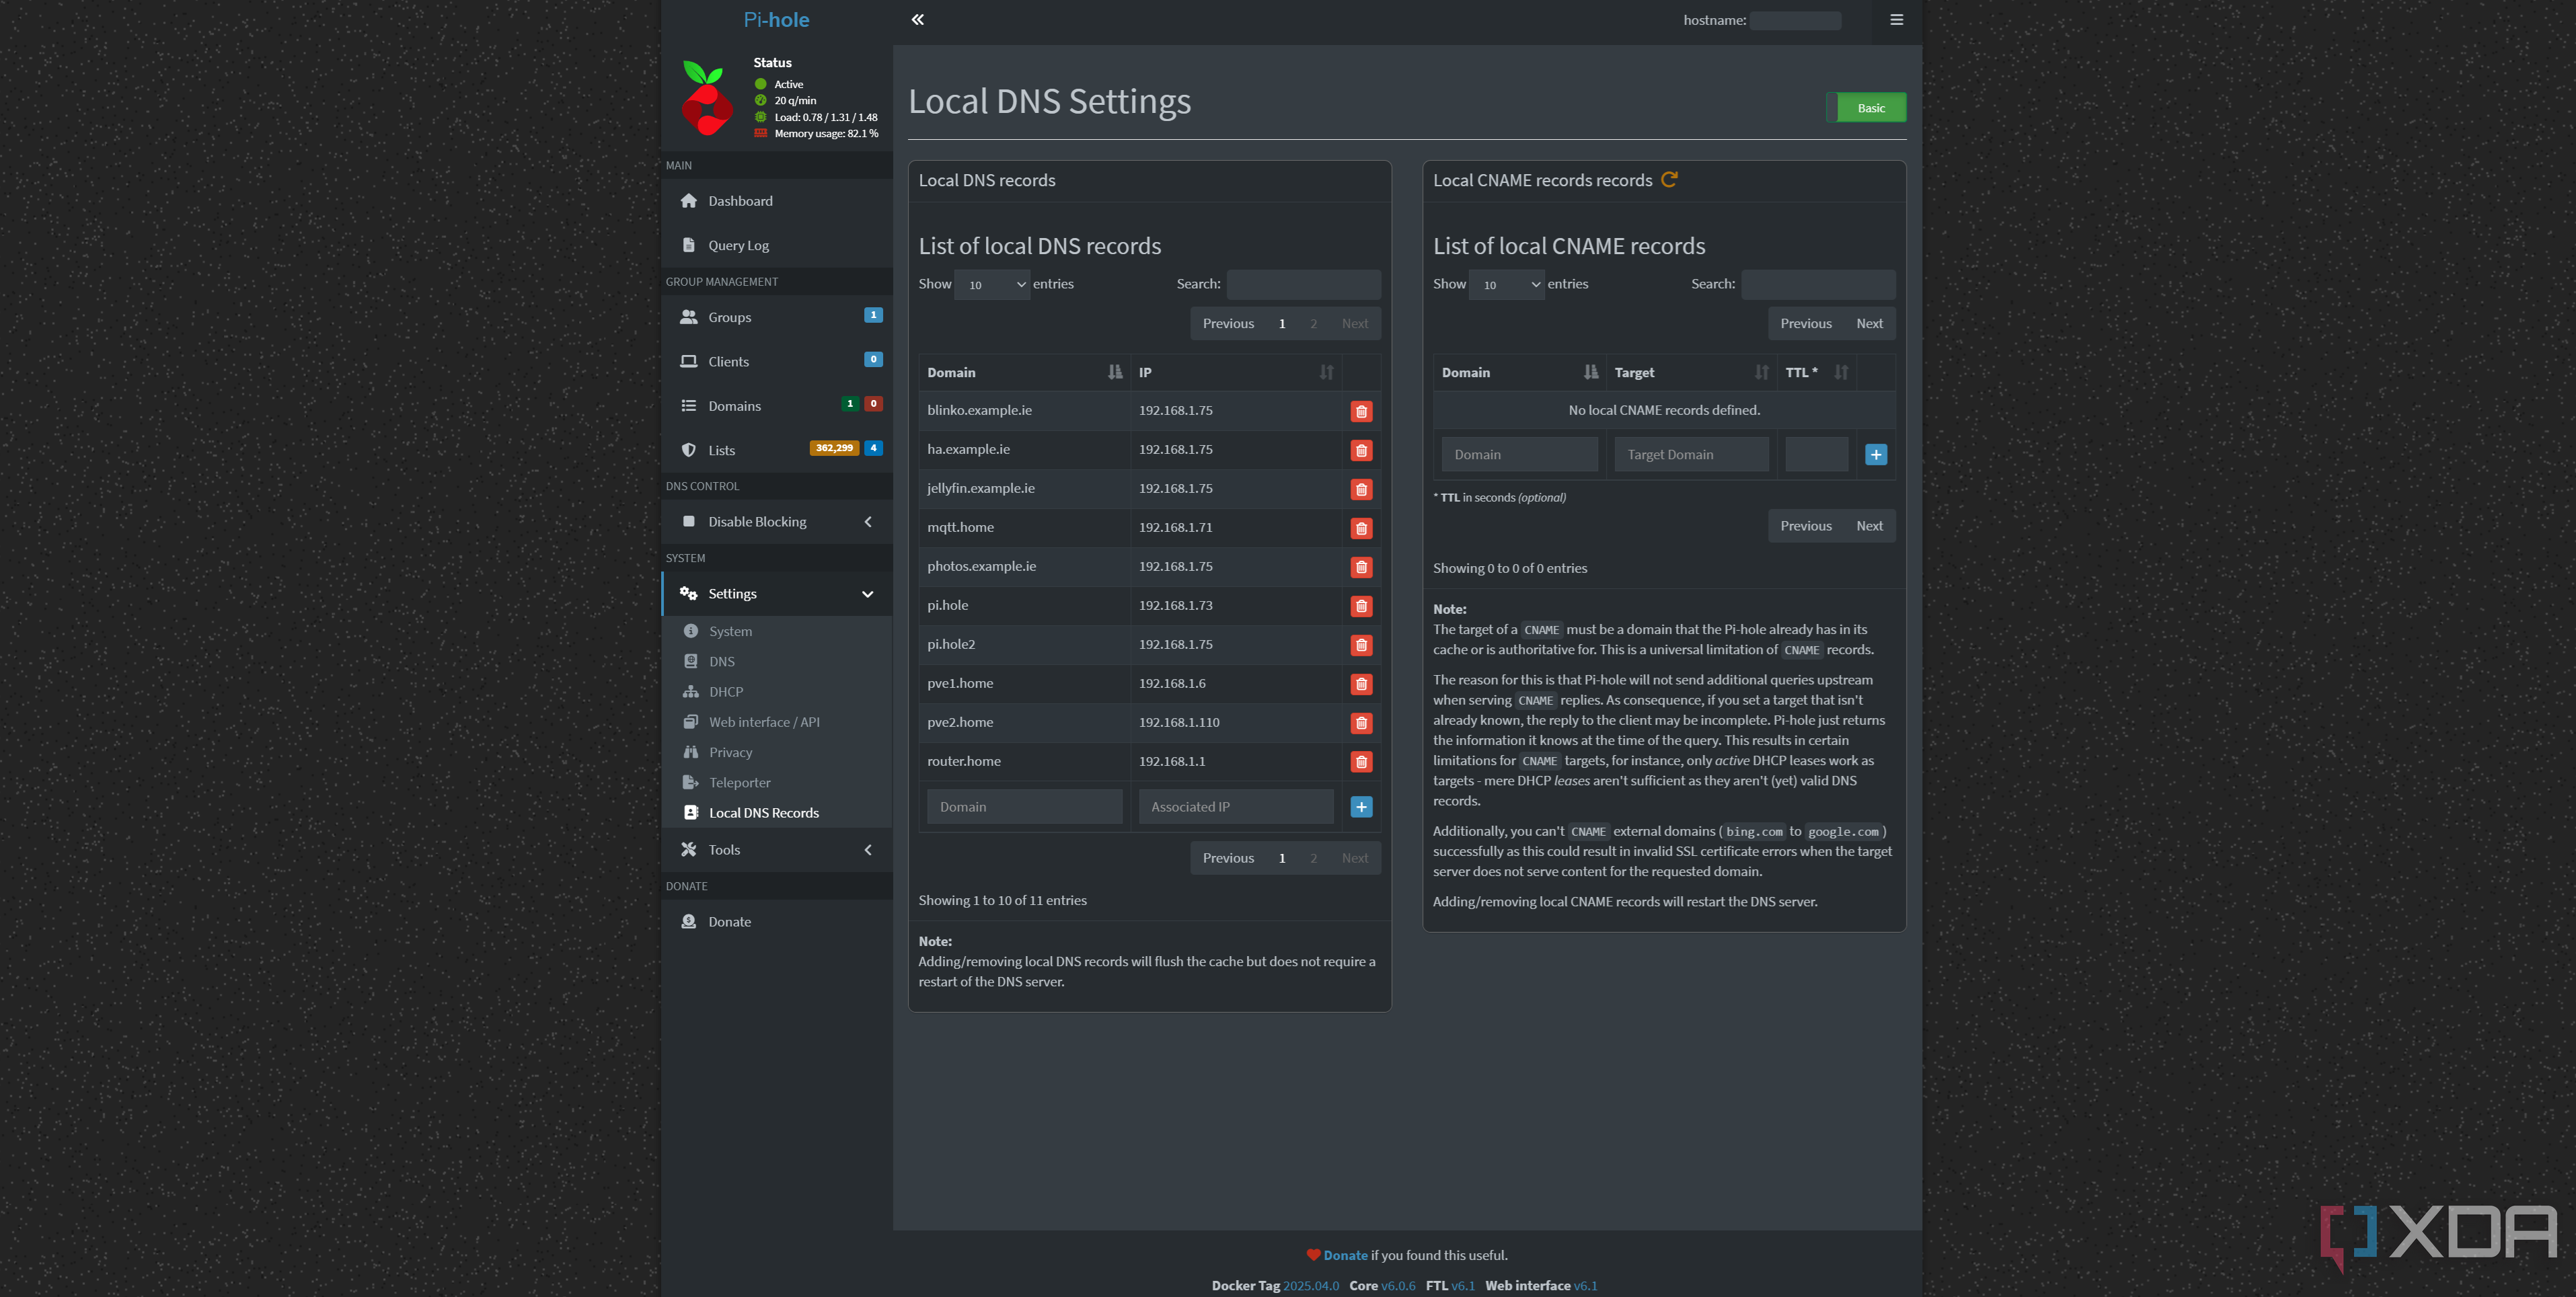
As a bonus, if you don't want to use the Tailscale VPN at home, you can easily override the DNS record for your subdomains on your local network using a Pi-hole. You'll need to disable the Tailscale DNS per-device if you haven't already, so that it can use your Pi-hole as a DNS server. Once you have, on your Pi-hole, go to Settings, Local DNS records, and add a subdomain that you'd like to override, such as truenas.example.ie. Change the IP address to the local IP address of your Caddy instance.
Your SSL certificates will still work, and your reverse proxy can still proxy the connection as it sees the request came from "truenas.example.ie". This isn't at all necessary, and in most cases, Tailscale will identify that a direct connection is possible and do the same thing anyway. However, this means you don't even need to have Tailscale enabled when you're at home, and can still access all of your self-hosted services, too. It's also great for devices that can't use Tailscale, assuming your DNS is set to your Pi-hole in your router's DHCP.
While you're here, if you haven't done it before, feel free to play with the local DNS and create some other convenient domains for later usage. For example, "http://pi.hole" in my browser brings me straight to the Pi-hole web interface, and I also have "router.home" to access my router's control panel. It's not necessary in the slightest, but it's a nice-to-have feature to make things a little more human-readable and convenient.
There are many ways to access your services remotely
This is just what works for me
While this is the setup that I prefer, there are many ways to access your self-hosted services while travelling, and this is just a way that I personally like and makes the most sense for my use case. You can use a simple WireGuard VPN if you'd prefer to just have complete internal access to your network, or self-host a VPN solution to gain entry to your network using a tool like Pangolin or Headscale with Tailscale.
In this particular instance, I migrated to Caddy from Nginx Proxy Manager a while ago, and it took a couple of hours to get my head around migrating everything and making it work. I'm so glad that I did, though; my Caddy file is easily backed up and moved to other hosts if I need it, and it's very convenient to be able to add and remove services quickly through a command line if I need to. I'm currently in the process of moving Caddy to my OPNsense setup, and it works perfectly so far.
I travel a fair bit, and when it comes to accessing my self-hosted services from anywhere in the world, I'm very happy with this solution. It may not perfectly suit your needs, but hopefully this gives you some ideas on how to do it yourself!
Related

