.png)

This blog provides a step-by-step guide to configure Apache APISIX for AI traffic splitting and load balancing between API versions, covering security setup, canary testing, and deployment monitoring.
AI/ML API is a one-stop, OpenAI-compatible endpoint that is trusted by 150,000+ developers to 300+ state-of-the-art models—chat, vision, image/video/music generation, embeddings, OCR, and more—from Google, Meta, OpenAI, Anthropic, Mistral, and others.
Apache APISIX is a dynamic, real-time, high-performance API Gateway. APISIX API Gateway provides rich traffic management features and can serve as an AI Gateway through its flexible plugin system.
Modern AI workloads often require smooth version migrations, A/B testing, and rolling updates. This guide shows you how to:
- Install Apache APISIX with Docker quickstart.
- Secure the Admin API with keys and IP whitelisting.
- Define separate routes for API versions v1 and v2.
- Implement weighted traffic splitting (50/50) via the traffic-split plugin.
- Verify the newly created split endpoint functionality.
- Load test and monitor distribution accuracy.
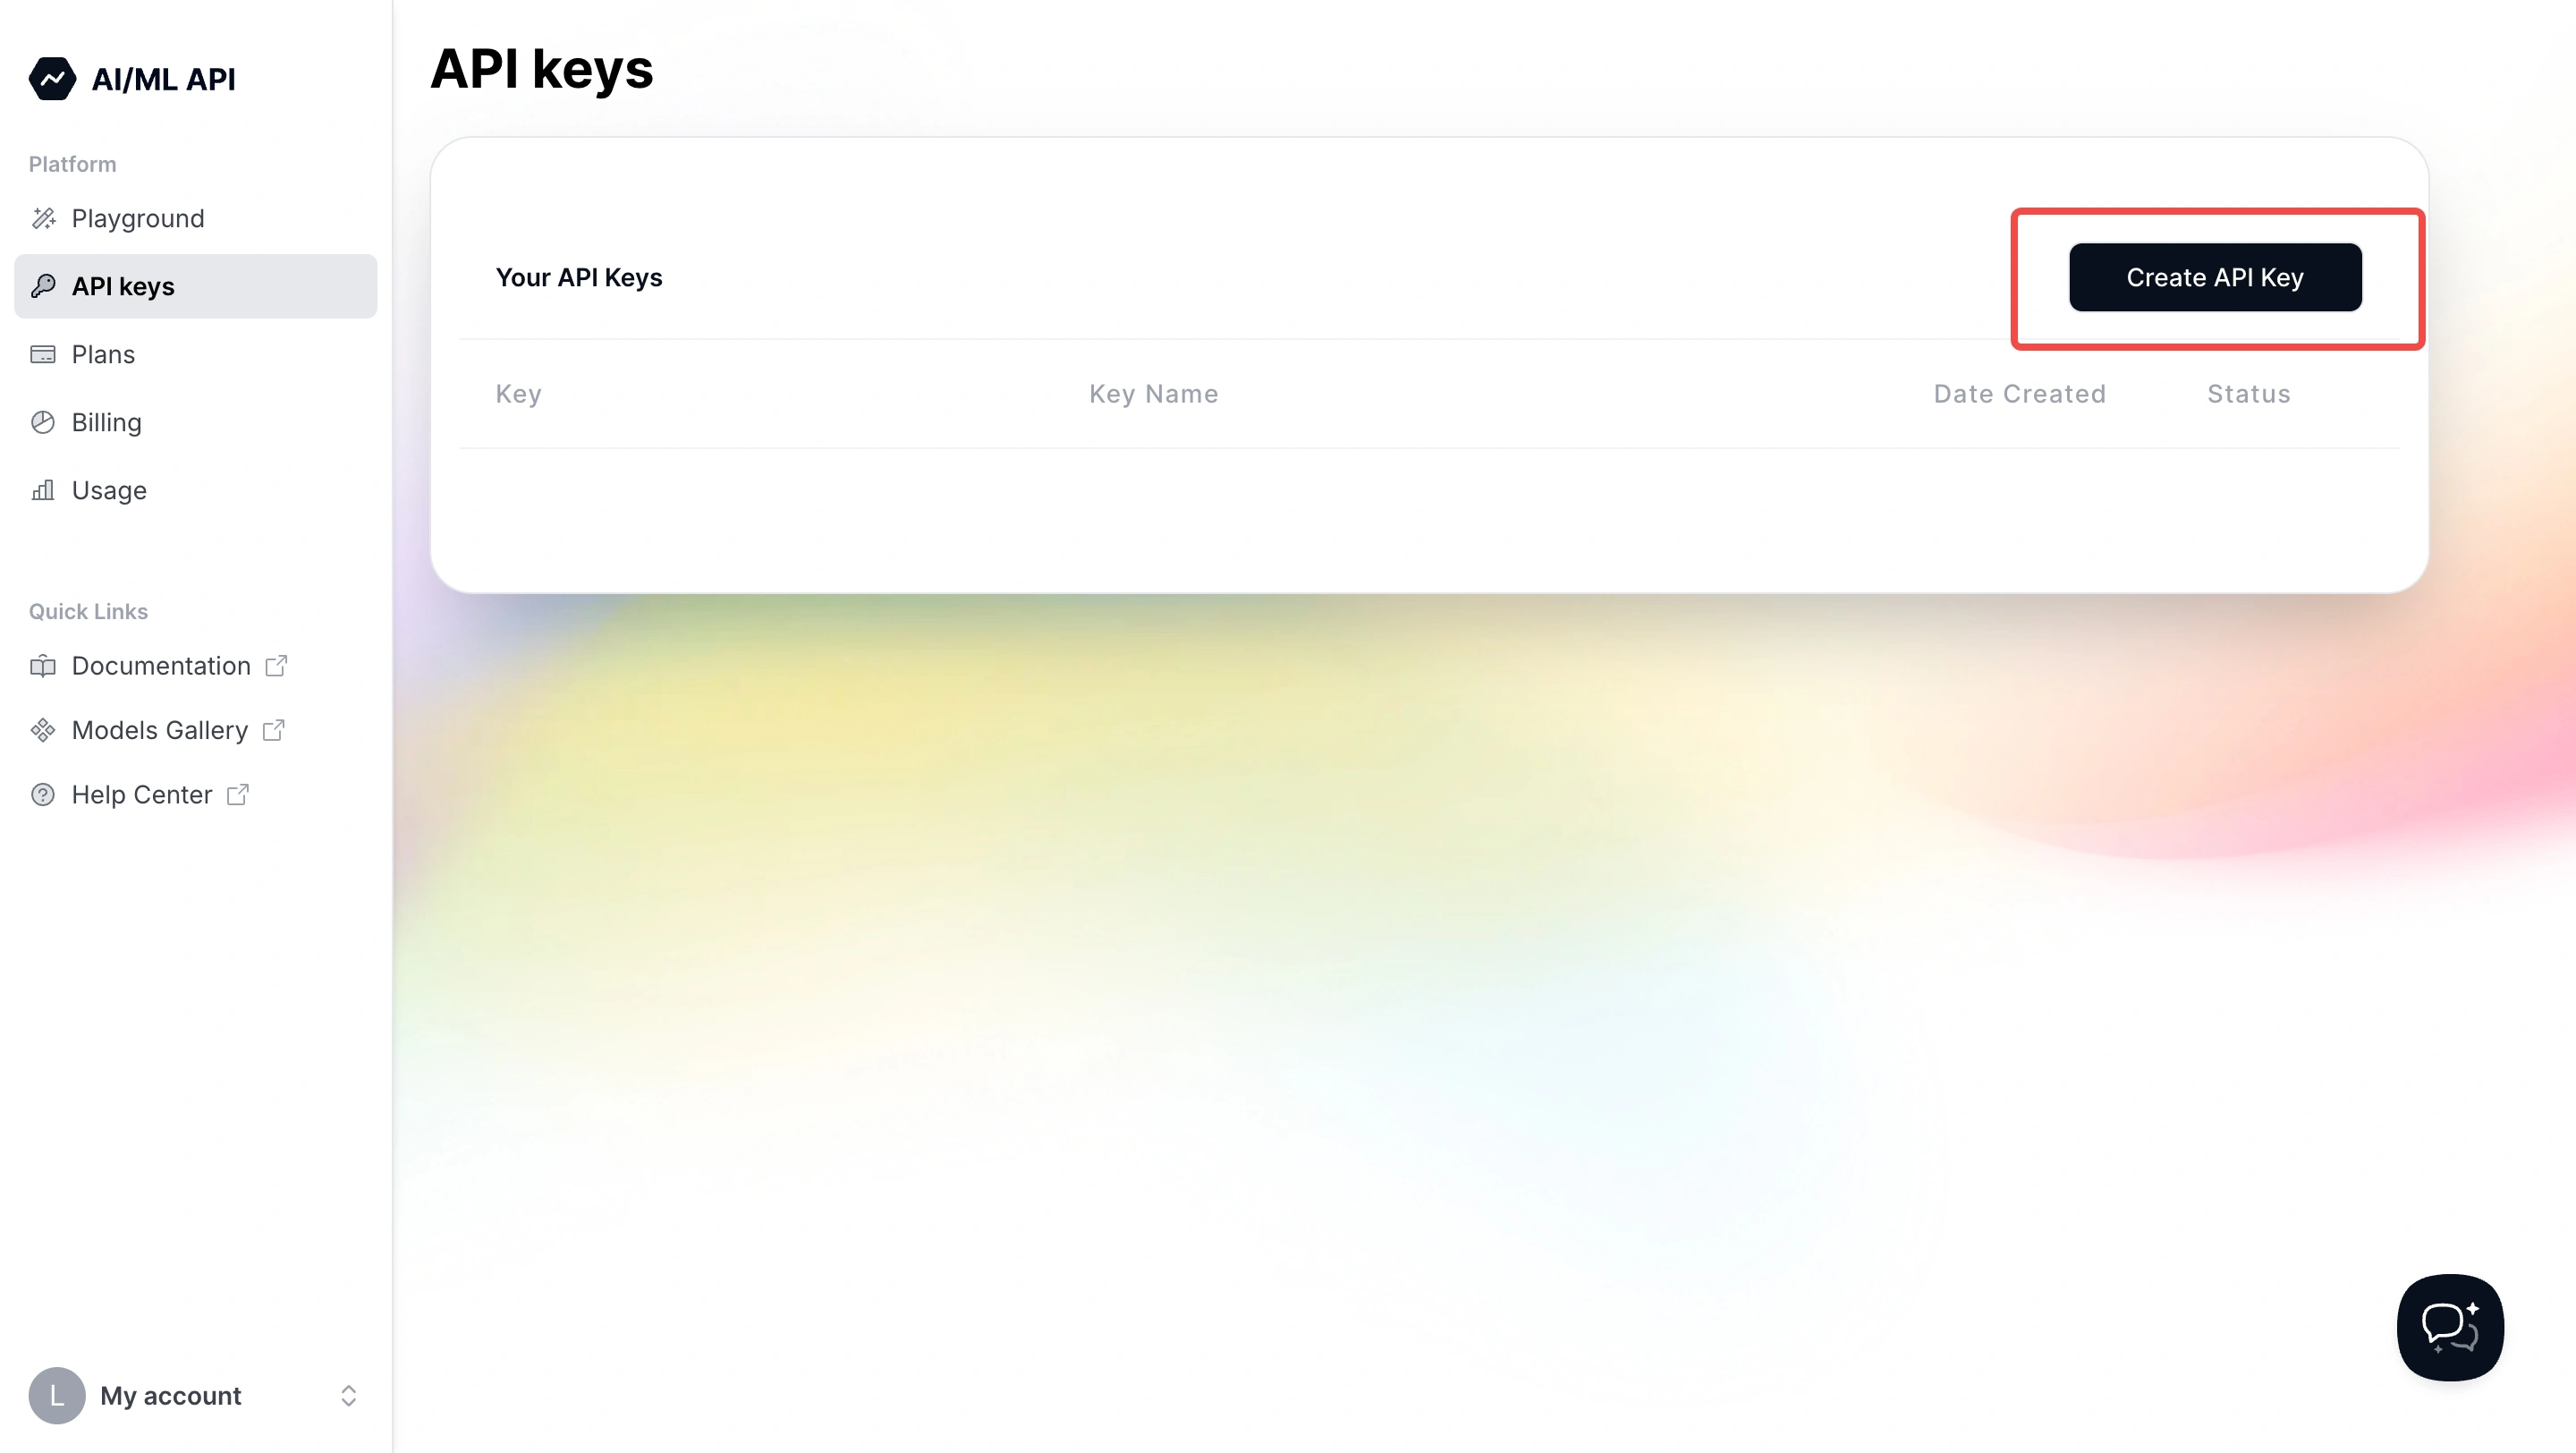
To perform authenticated requests, you'll need an AI/ML API key. You can get one at https://aimlapi.com/app/keys/ and use it as a Bearer token in your Authorization headers.
Click to Preview
Quickstart Installation
curl -sL https://run.api7.ai/apisix/quickstart | sh
curl -I http://127.0.0.1:9080 | grep Server
Tip: If you encounter port conflicts, adjust Docker host networking or map to different ports in the quickstart script.
By default, quickstart bypasses Admin API authentication. For any non-development environment, enforce security:
1. Set an Admin Key
Edit conf/config.yaml inside the APISIX container or local install directory, replacing the example key with your own API key obtained from the link above:
enable_admin: true
admin_key_required: true
admin_key:
- name: admin
key: YOUR_ADMIN_KEY_HERE
role: admin
Security Best Practice: Use at least 32 characters, mix letters/numbers/symbols, and rotate keys quarterly.
2. Whitelist Management IPs (allow_admin)
Add your management or local networks under the admin: section:
allow_admin:
- 127.0.0.0/24
- 0.0.0.0/0
Warning: 0.0.0.0/0 opens Admin API to the world! Lock this down to specific subnets in production.
3. Restart APISIX
Check Logs: docker logs apisix-quickstart --tail 50 to ensure no errors about admin authentication.
Define Basic Routes for v1 and v2
Before splitting traffic, ensure each version works individually.
1. Route for v1
-X PUT \
-H "X-API-KEY: YOUR_ADMIN_KEY_HERE" \
-d '{
"uri": "/test/v1",
"upstream": {
"type": "roundrobin",
"nodes": {"api.aimlapi.com:443": 1},
"scheme": "https",
"pass_host": "node"
}
}'
Tip: Use id fields if you want to manage or delete routes easily later.
2. Route for v2
-X PUT \
-H "X-API-KEY: YOUR_ADMIN_KEY_HERE" \
-d '{
"uri": "/test/v2",
"upstream": {
"type": "roundrobin",
"nodes": {"api.aimlapi.com:443": 1},
"scheme": "https",
"pass_host": "node"
}
}'
Use the traffic-split plugin for controlled distribution between v1 and v2. In the admin request below, replace YOUR_ADMIN_KEY_HERE with your actual key.
-X PUT \
-H "X-API-KEY: YOUR_ADMIN_KEY_HERE" \
-d '{
"id": "aimlapi-split",
"uri": "/chat/completions",
"upstream": {
"type": "roundrobin",
"nodes": {"api.aimlapi.com:443": 1},
"scheme": "https",
"pass_host": "node"
},
"plugins": {
"traffic-split": {
"rules": [
{
"weight": 50,
"upstream": {"type":"roundrobin","nodes":{"api.aimlapi.com:443":1},"scheme":"https","pass_host":"node"},
"rewrite": {"uri":"/v1/chat/completions"}
},
{
"weight": 50,
"upstream": {"type":"roundrobin","nodes":{"api.aimlapi.com:443":1},"scheme":"https","pass_host":"node"},
"rewrite": {"uri":"/v2/chat/completions"}
}
]
}
}
}'
Tip: Adjust the weight values to shift traffic ratios (e.g., 80/20 for canary).
Note: rewrite must match the internal API path exactly.
Verify Split Endpoint Functionality
Test the /chat/completions endpoint you just created. Replace <AIML_API_KEY> with the key obtained earlier and use it as a Bearer token:
-H "Authorization: Bearer <AIML_API_KEY>" \
-H "Content-Type: application/json" \
-d '{"model":"gpt-4","messages":[{"role":"user","content":"ping"}]}'
Expected Output:
Tip: Use -v for verbose output to troubleshoot headers or TLS issues.
After configuring the split route, use the following commands to validate distribution. Replace <AIML_API_KEY> with your Bearer token.
time seq 100 | xargs -I {} curl -s -o /dev/null -X POST http://127.0.0.1:9080/chat/completions \
-H "Authorization: Bearer <AIML_API_KEY>" \
-H "Content-Type: application/json" \
-d '{"model":"gpt-4","messages":[{"role":"user","content":"ping"}]}'
echo "v1 hits: $(docker logs apisix-quickstart --since 5m | grep -c '188.114.97.3:443')"
echo "v2 hits: $(docker logs apisix-quickstart --since 5m | grep -c '188.114.96.3:443')"
Expected: Approximately 50 requests to each upstream.
Tip: Use Prometheus or OpenTelemetry plugins for real‑time metrics instead of manual log parsing.
Best Practices & Next Steps
- Rate Limiting & Quotas: Add limit-count plugin to protect your upstream from spikes.
- Authentication: Layer on the key-auth plugin for consumer management.
- Circuit Breaker: Prevent cascading failures with the api-breaker plugin.
- Observability: Integrate Prometheus, Skywalking, or Loki for dashboards and alerts.
- Infrastructure as Code: Consider managing APISIX config via Kubernetes CRDs or ADC for reproducibility.

