.png)

In today's AI-driven world, creating intelligent automation workflows requires more than just language models. You need a complete ecosystem that combines workflow orchestration, local AI inference, and secure tool integration. This comprehensive tutorial introduces the powerful three-component stack: n8n, Docker Model Runner, and MCP Toolkit – a combination that delivers enterprise-grade AI automation while maintaining complete data privacy and control.
This tutorial will guide you through building a complete local AI automation platform that can analyze code, process documents, interact with GitHub repositories, and orchestrate complex multi-step workflows – all running entirely on your machine.
What is n8n?
n8n (pronounced "n-eight-n") is a fair-code workflow automation platform that combines the flexibility of code with the speed of no-code solutions. With over 400 integrations and native AI capabilities, n8n allows you to:
- Build visual workflows with drag-and-drop interface
- Write custom JavaScript/Python when needed
- Self-host with complete control over your data
- Integrate with virtually any service or API
- Create AI-powered automations
What is Docker Model Runner?
Docker Model Runner: The Missing Piece for Your GenAI Development Workflow - Collabnix
Ever tried building a GenAI application and hit a wall? 🧱
![]() CollabnixAjeet Raina
CollabnixAjeet Raina
Docker Model Runner is an experimental feature in Docker Desktop 4.40+ that enables you to run large language models (LLMs) locally on your host system - not in containers. Instead, it runs models directly on your Mac using a host-installed inference server (llama.cpp) for optimal GPU acceleration. Key features include:
- Host-native execution: Models run directly on your host machine, not in containers
- Apple Silicon optimization: Direct access to Metal API for GPU acceleration
- OCI artifact storage: Models stored as standardized artifacts in Docker Hub
- OpenAI-compatible API: Familiar endpoints for easy integration
- No containerization overhead: Faster inference without container layers
- Mac-only currently: Optimized for Apple Silicon (M1/M2/M3/M4), Windows support coming soon
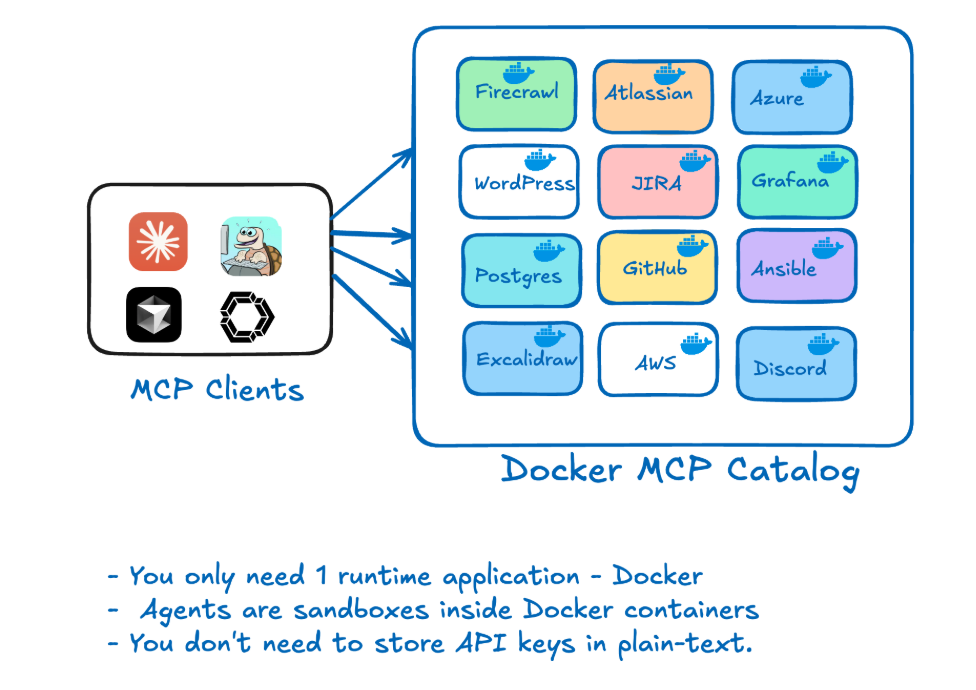 An image showing the power of Docker MCP Toolkit
The Model Context Protocol (MCP) Toolkit is a powerful addition to Docker Desktop that enables AI agents to securely interact with external systems and data sources. MCP provides:
- Standardized protocols for AI-tool interactions
- Secure sandboxed execution of external tools
- GitHub integration for repository operations
- File system access for document processing
- API connectivity to various services
- Tool chaining for complex automation workflows
Why Combine n8n + Docker Model Runner + MCP Toolkit?
This three-component stack creates a complete AI automation ecosystem:
- Complete Data Privacy: All processing happens locally on your host machine
- Native Performance: Direct GPU access without containerization overhead
- Advanced Tool Integration: MCP enables AI agents to interact with GitHub, file systems, and APIs
- Cost Efficiency: No per-token charges from cloud providers
- Offline Capability: Work without internet connectivity after initial setup
- Standardized Distribution: Models and tools stored as OCI artifacts
- Powerful Workflow Engine: n8n orchestrates complex multi-step automations
- Apple Silicon Optimization: Leverages Metal API for maximum performance
- Secure Tool Execution: MCP provides sandboxed access to external systems
Prerequisites
Before starting, ensure you have:
- Mac with Apple Silicon (M1/M2/M3/M4) - Windows support coming soon
- Docker Desktop 4.40+ with Model Runner support
- 8GB+ RAM (16GB+ recommended for larger models)
- 10GB+ free disk space (for models and containers)
- Basic Docker and workflow automation knowledge
Note: Currently, Docker Model Runner is optimized for macOS with Apple Silicon. Windows support with NVIDIA GPU arrived early April 2025.
How Docker Model Runner Works
Unlike traditional containerized AI solutions, Docker Model Runner takes a unique approach:
Host-Native Execution
- No containers for models: AI models run directly on your host machine using llama.cpp
- Direct GPU access: Leverages Apple's Metal API without containerization overhead
- Host-level process: Docker Desktop runs the inference server natively on your Mac
Model Storage & Distribution
- OCI artifacts: Models stored as standardized artifacts in Docker Hub
- No compression layers: Faster downloads since model weights are uncompressible
- Efficient storage: No need for both compressed and uncompressed versions
- Registry compatibility: Works with any Docker-compatible registry
Connection Methods
Docker Model Runner provides multiple access patterns:
- From containers: http://model-runner.docker.internal/
- Host via Docker socket: /var/run/docker.sock
- Host via TCP: When enabled, direct port access (default: 12434)
This architecture provides the performance benefits of native execution while maintaining Docker's standardized distribution and management capabilities.
Step 1: Enable Docker Model Runner
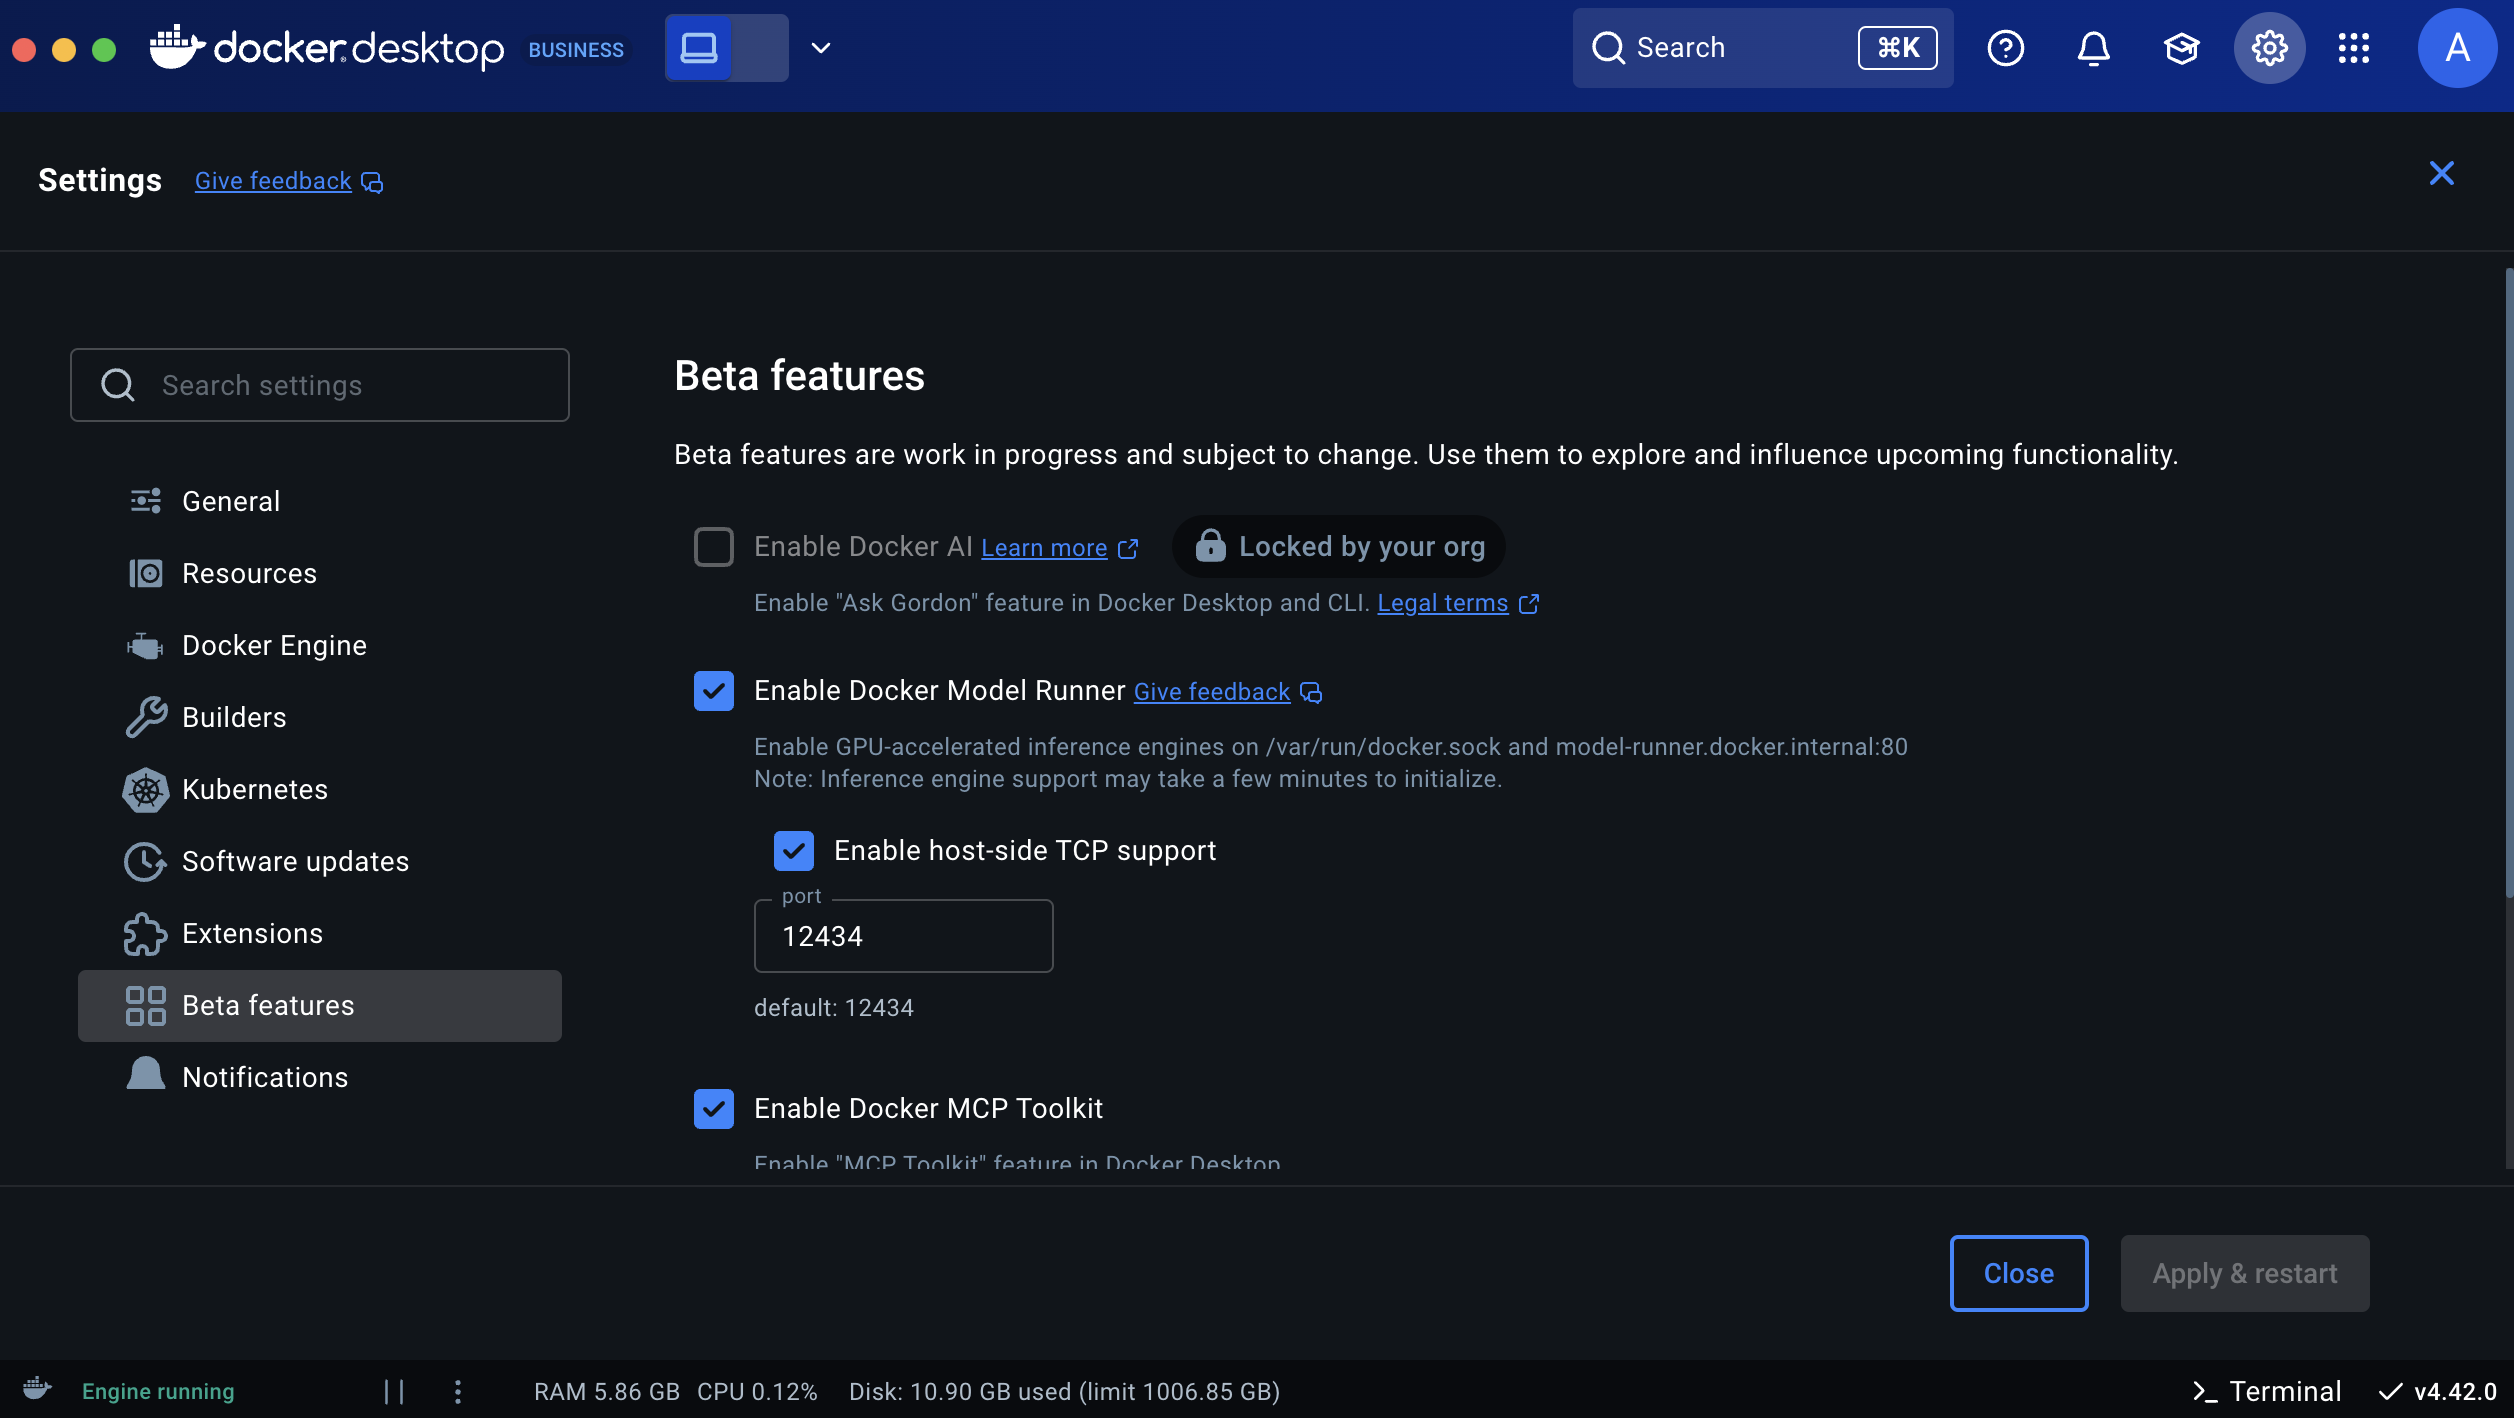
First, enable the Model Runner feature in Docker Desktop:
Via Docker Desktop UI
- Open Docker Desktop Settings
- Navigate to Features in development → Beta
- Enable "Enable Docker Model Runner"
- Optionally enable "Enable host-side TCP support" (port 12434)
- Click Apply & restart
Via Command Line
# Enable Model Runner docker desktop enable model-runner # Enable with TCP support (optional) docker desktop enable model-runner --tcp 12434Step 2: Download AI Models
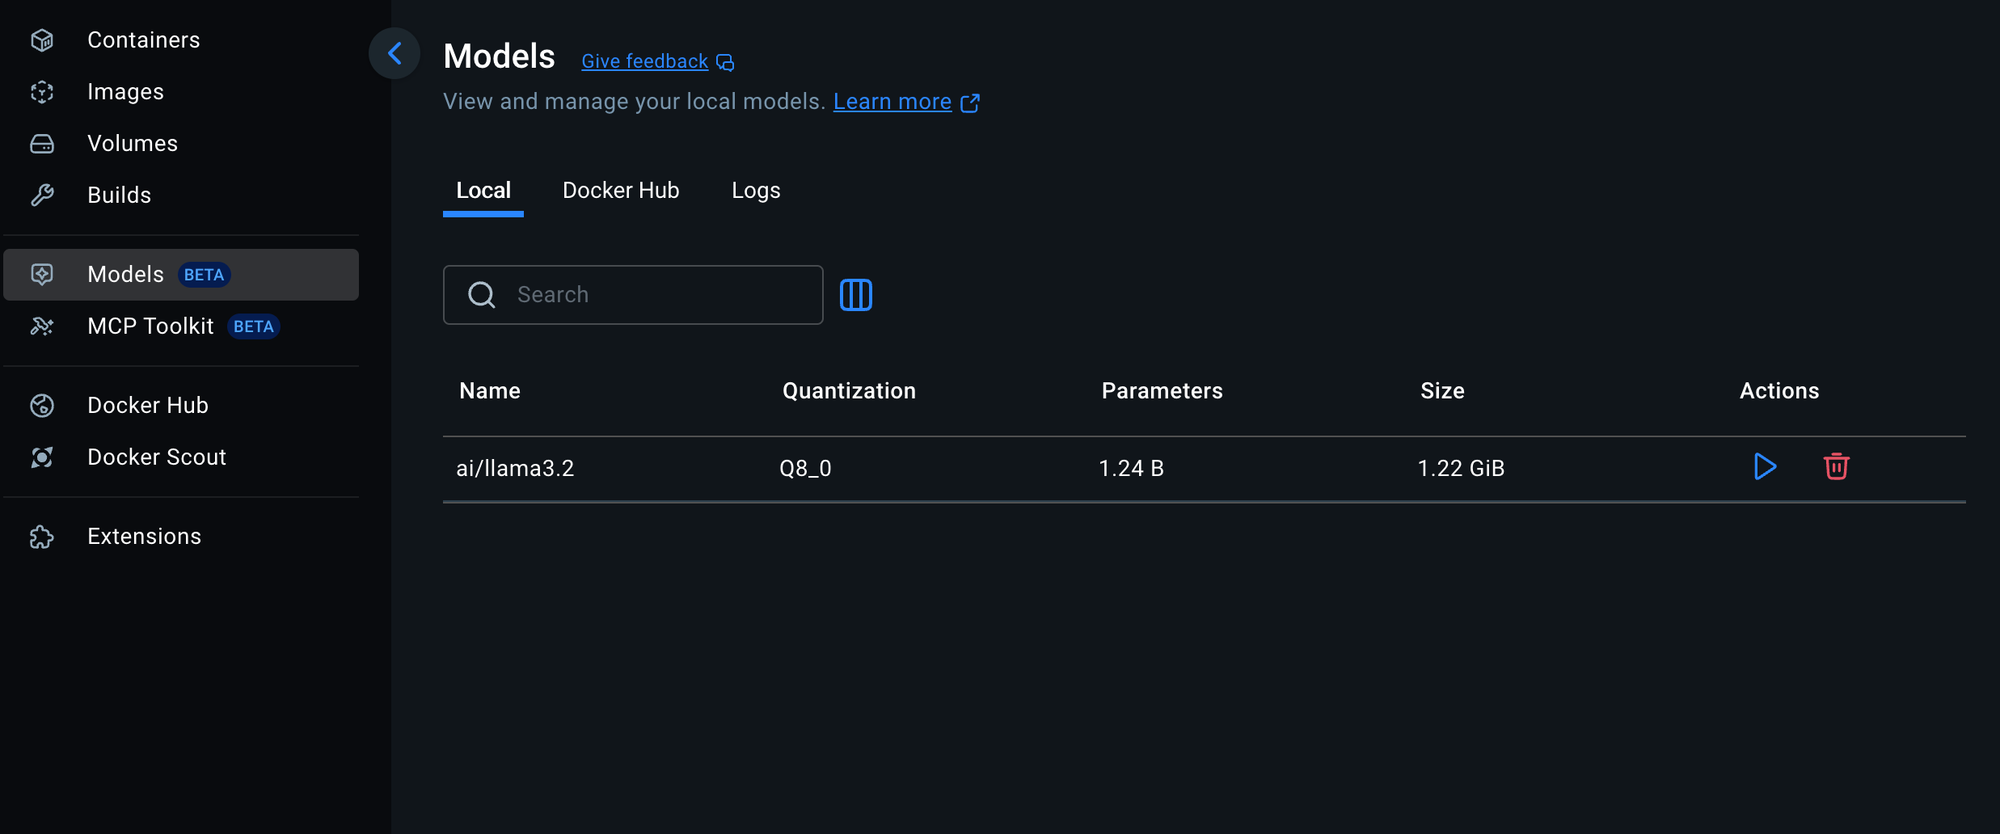
Pull your preferred models using the new docker model CLI (these run natively on your host, not in containers):
# Lightweight model (1.2GB) - fast, good for testing docker model pull ai/llama3.2:1B-Q8_0 # Balanced model (3GB) - recommended for most use cases docker model pull ai/llama3.2:3B # More capable model (2GB) - good balance of size and capability docker model pull ai/gemma2:2B # List downloaded models docker model ls # Test a model directly docker model run ai/llama3.2:1B-Q8_0 "Hello, how are you?"Important: These models run directly on your host using llama.cpp for optimal Apple Silicon GPU acceleration, not in Docker containers.
Model Comparison
| ai/llama3.2:1B-Q8_0 | 1.2GB | Testing, simple tasks | Very Fast |
| ai/llama3.2:3B | 3GB | General purpose | Fast |
| ai/gemma2:2B | 2GB | Balanced performance | Fast |
| ai/qwen2.5:7B | 7GB | Complex reasoning | Slower |
| ai/mistral:7B | 7GB | Code & analysis | Slower |
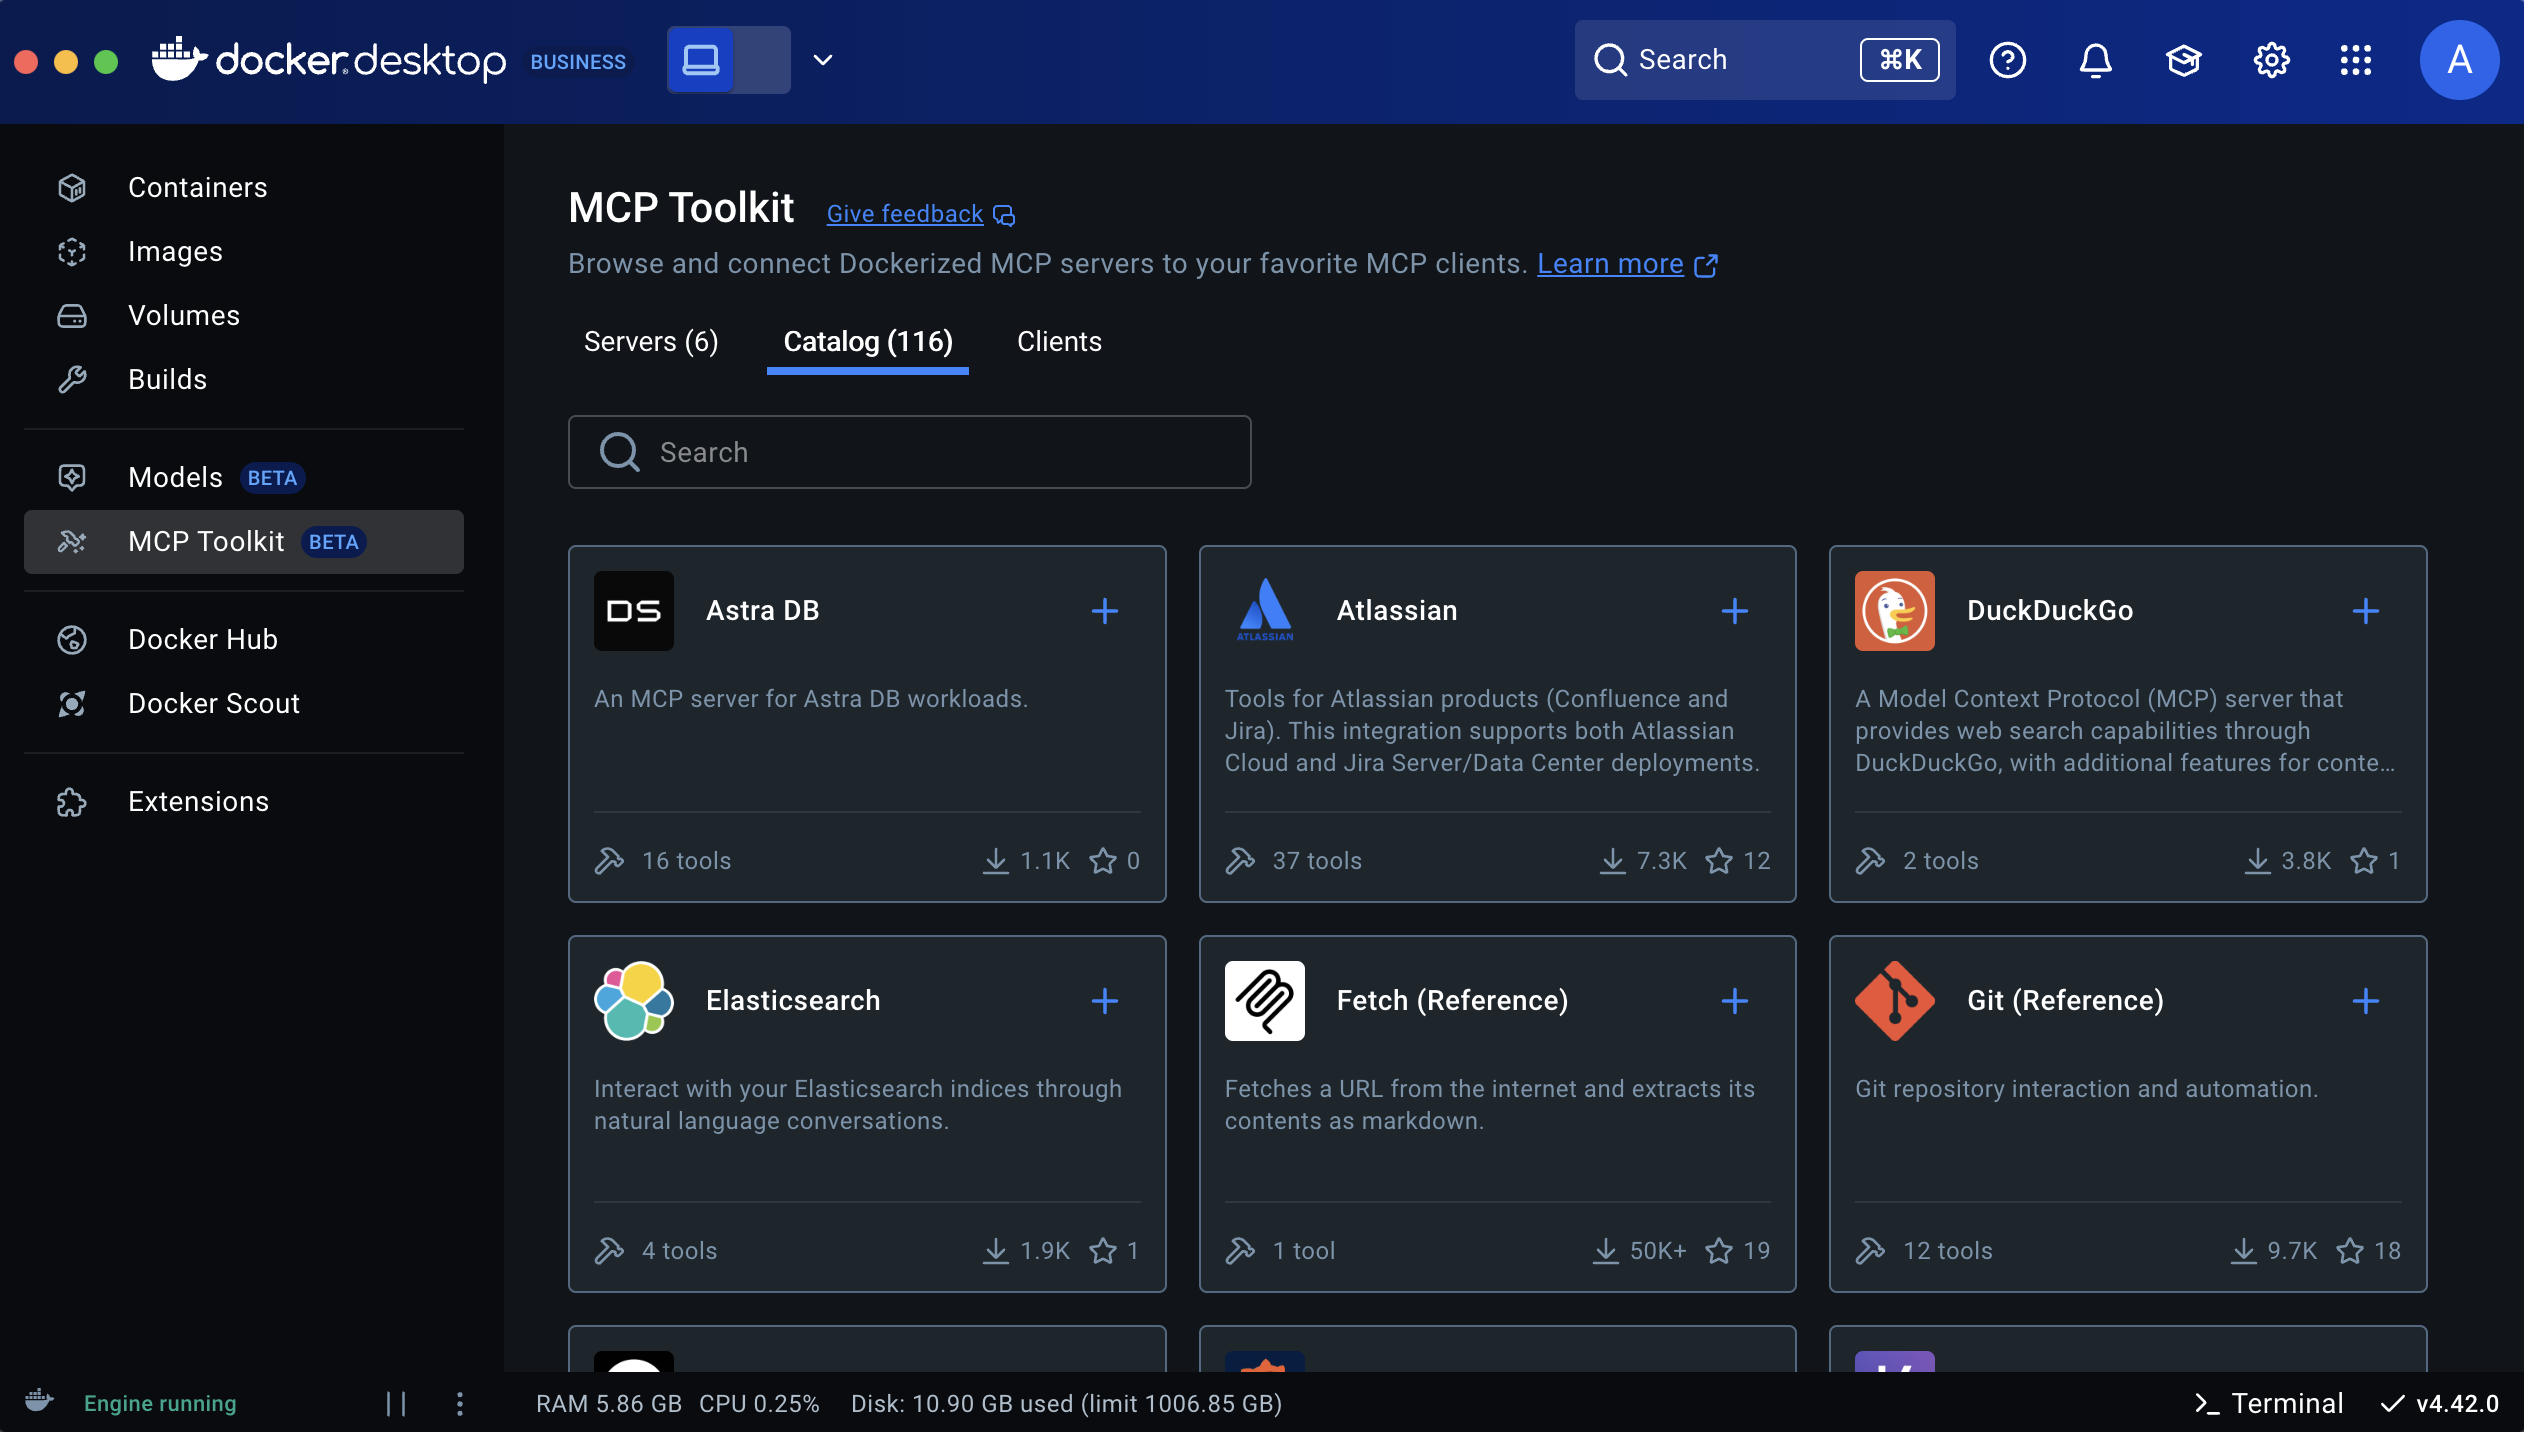
The MCP Toolkit enables AI agents to interact with external systems securely. Install it through Docker Desktop:
Via Docker Desktop Extensions
- Open Docker Desktop
- Go to Extensions in the left sidebar
- Search for "MCP Toolkit" in the marketplace
- Click Install on the Docker MCP Toolkit extension
- Wait for installation to complete
Verify MCP Installation
# Check if MCP CLI is available docker mcp --help # List available MCP servers docker mcp server ls # Install GitHub MCP server (for repository operations) docker mcp server install github-official # Verify GitHub MCP server docker mcp server ls | grep githubConfigure GitHub MCP
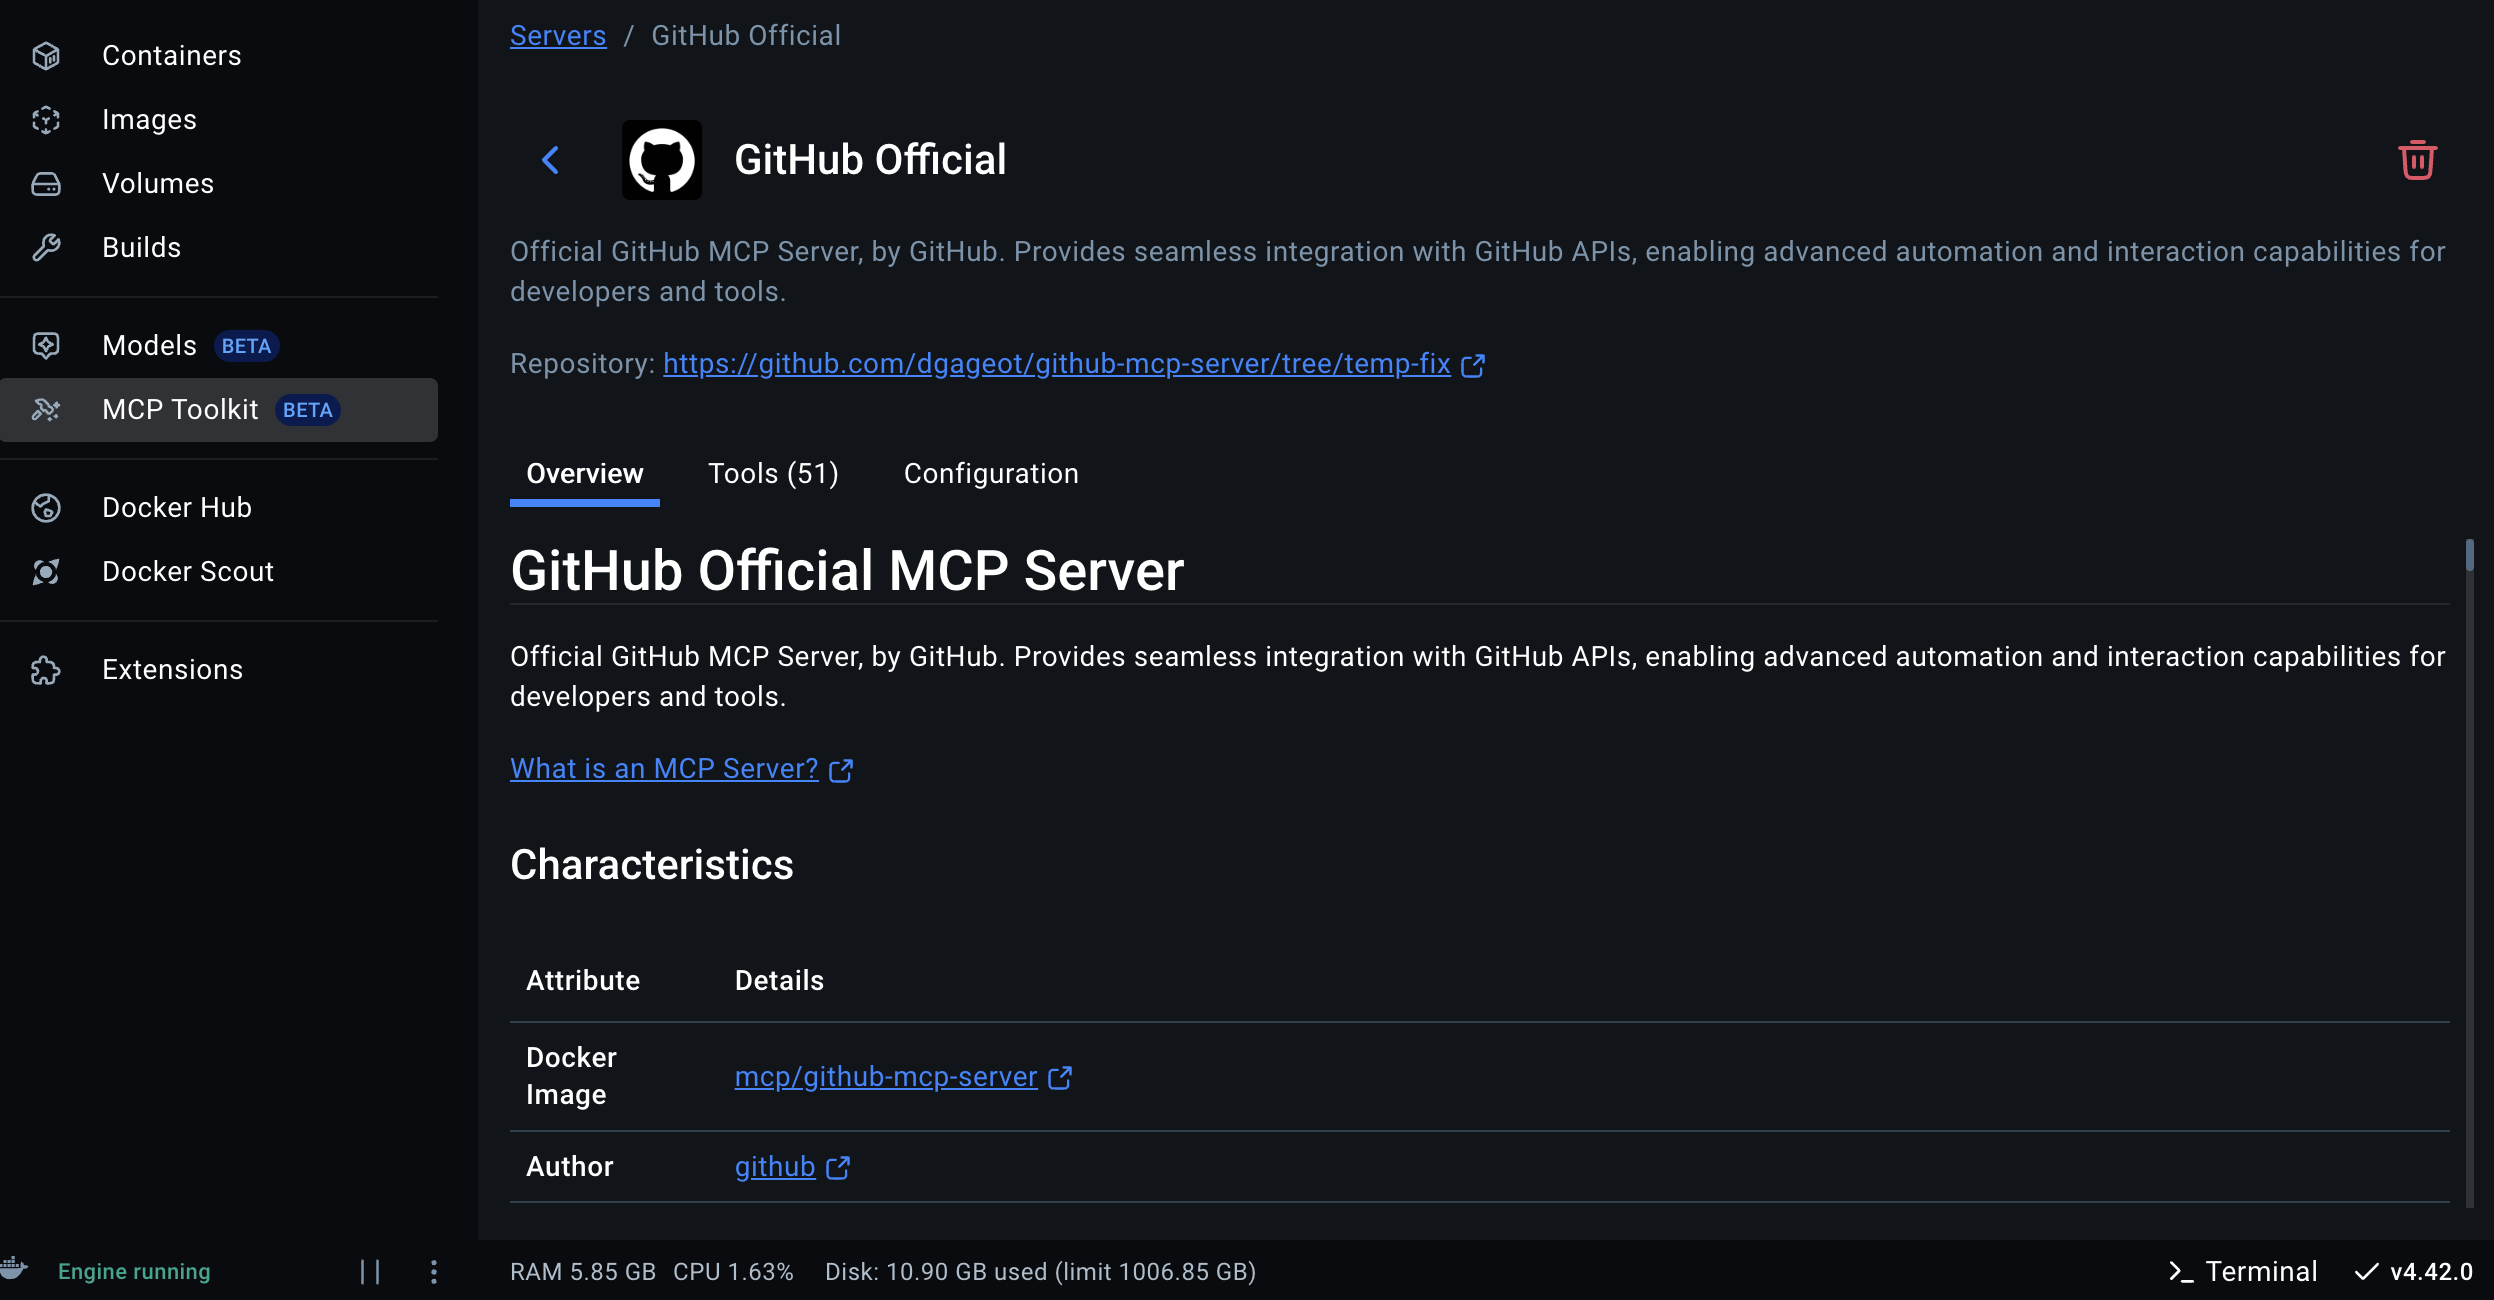
- Select Docker MCP Toolkit and explore MCP Catalog
- Search for GitHub Official
Add Personal Access token. If you haven't yet created PAT, follow the steps below.
- Create a GitHub Personal Access Token (PAT)
- Go to GitHub.com and sign in to your account
- Click your profile picture in the top-right corner
- Select "Settings"
- Scroll down to "Developer settings" in the left sidebar
- Click on "Personal access tokens" → "Tokens (classic)"
- Click "Generate new token" → "Generate new token (classic)"
- Give your token a descriptive name like "Docker MCP GitHub Access"
- Select the following scopes (permissions):
- repo (Full control of private repositories)
- workflow (if you need workflow actions)
- read:org (if you need organization access)
- Click "Generate token"
- Configure the GitHub MCP Server in Docker
- Open Docker Desktop
- Navigate to the MCP Server
- Find the GitHub tool (official) card and click on it to expand details. Add PAT details.
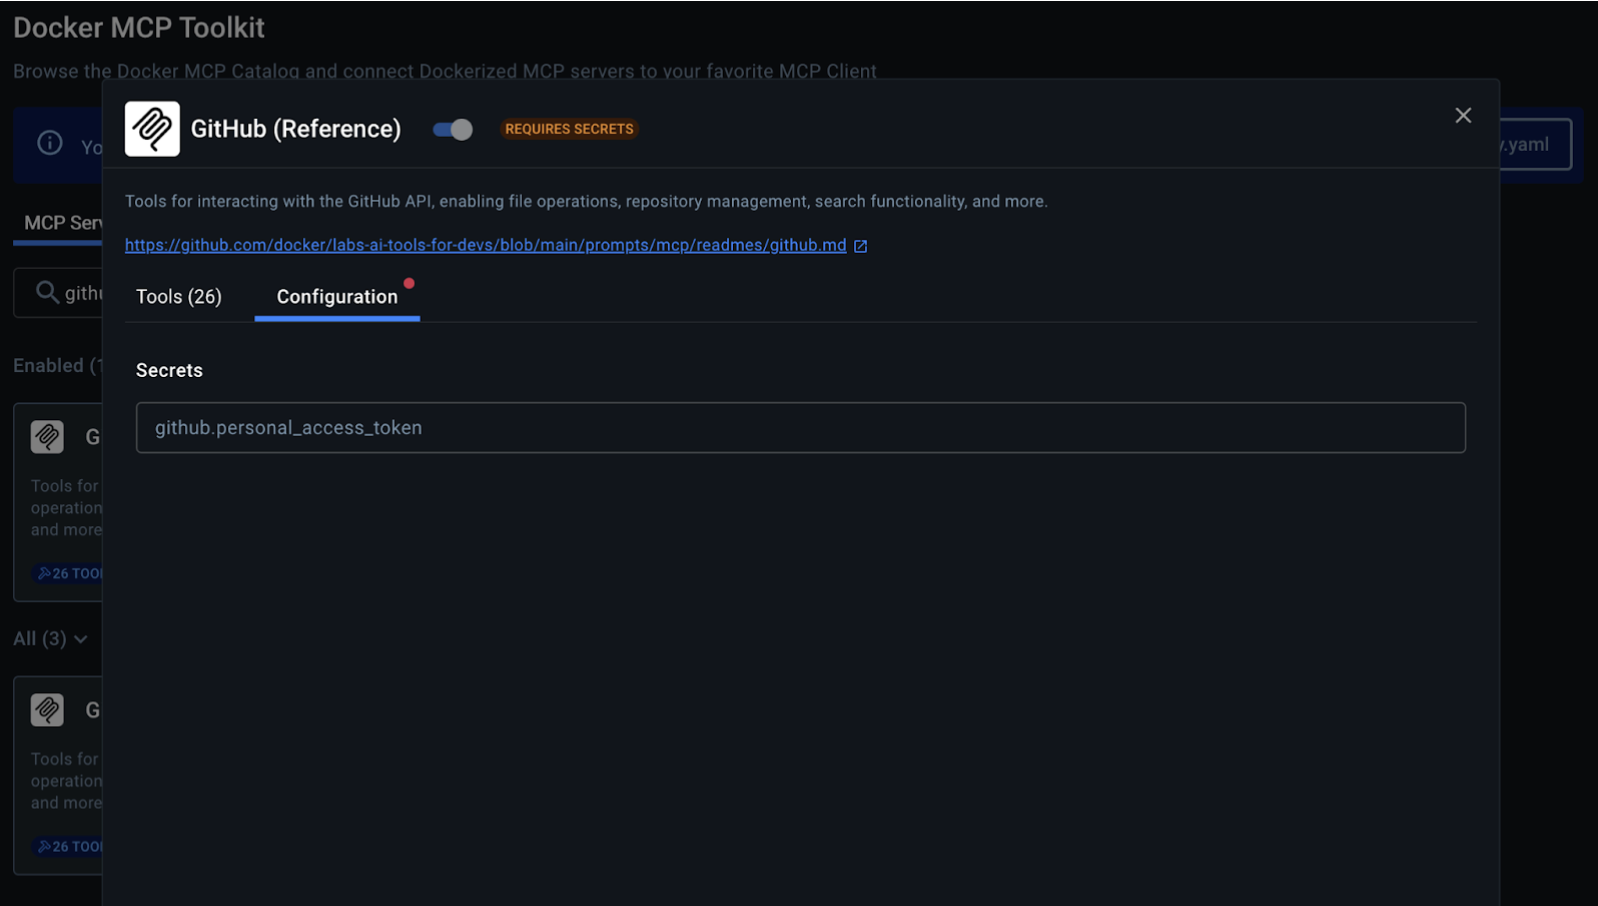
If you want to stick to the terminal, you can use docker mcp secret command to set up the GitHub token as a secret:
docker mcp secret set GITHUB.PERSONAL_ACCESS_TOKEN=github_pat_YOUR_TOKEN_HEREFor example:
docker mcp secret set GITHUB.PERSONAL_ACCESS_TOKEN=github_pat_11AACMRCAXXXXXXxEp_QRZW43Wo1k6KYWwDXXXXXXXXGPXLZ7EGEnse82YM Info: No policy specified, using default policyFor GitHub repository operations, configure authentication:
# Set GitHub token (get from https://github.com/settings/tokens) docker mcp server configure github-official --github-token YOUR_GITHUB_TOKEN # Test GitHub MCP tools docker mcp tools list github-official # Example tools available: # - get_repository_info # - list_repositories # - create_issue # - list_pull_requests # - search_repositoriesStep 3: Project Setup
Create your project directory and required files:
mkdir n8n-ai-setup cd n8n-ai-setup mkdir shared # This will be mounted to /data/shared in n8nStep 4: Docker Compose Configuration
Create a docker-compose.yml file:
services: postgres: image: postgres:13 restart: unless-stopped environment: POSTGRES_DB: ${POSTGRES_DB} POSTGRES_USER: ${POSTGRES_USER} POSTGRES_PASSWORD: ${POSTGRES_PASSWORD} volumes: - postgres_data:/var/lib/postgresql/data healthcheck: test: ["CMD-SHELL", "pg_isready -U ${POSTGRES_USER} -d ${POSTGRES_DB}"] interval: 30s timeout: 10s retries: 5 redis: image: redis:7-alpine restart: unless-stopped volumes: - redis_data:/data healthcheck: test: ["CMD", "redis-cli", "ping"] interval: 30s timeout: 10s retries: 5 n8n: image: docker.n8n.io/n8nio/n8n:latest restart: unless-stopped environment: # Database DB_TYPE: postgresdb DB_POSTGRESDB_HOST: postgres DB_POSTGRESDB_PORT: 5432 DB_POSTGRESDB_DATABASE: ${POSTGRES_DB} DB_POSTGRESDB_USER: ${POSTGRES_USER} DB_POSTGRESDB_PASSWORD: ${POSTGRES_PASSWORD} # Redis QUEUE_BULL_REDIS_HOST: redis QUEUE_BULL_REDIS_PORT: 6379 # n8n Configuration N8N_ENCRYPTION_KEY: ${N8N_ENCRYPTION_KEY} N8N_HOST: ${N8N_HOST} N8N_PORT: 5678 N8N_PROTOCOL: http WEBHOOK_URL: http://localhost:5678/ GENERIC_TIMEZONE: ${GENERIC_TIMEZONE} # AI Configuration N8N_AI_ENABLED: true N8N_AI_OPENAI_DEFAULT_BASE_URL: http://model-runner.docker.internal/engines/llama.cpp/v1 N8N_AI_DEFAULT_MODEL: ${N8N_AI_DEFAULT_MODEL} # Execution Mode EXECUTIONS_MODE: main # File system N8N_DEFAULT_BINARY_DATA_MODE: filesystem ports: - "5678:5678" volumes: - n8n_data:/home/node/.n8n - ./shared:/data/shared depends_on: postgres: condition: service_healthy redis: condition: service_healthy # Uncomment for queue mode (production) # n8n-worker: # image: docker.n8n.io/n8nio/n8n:latest # restart: unless-stopped # environment: # # Same environment as n8n main # DB_TYPE: postgresdb # DB_POSTGRESDB_HOST: postgres # DB_POSTGRESDB_PORT: 5432 # DB_POSTGRESDB_DATABASE: ${POSTGRES_DB} # DB_POSTGRESDB_USER: ${POSTGRES_USER} # DB_POSTGRESDB_PASSWORD: ${POSTGRES_PASSWORD} # QUEUE_BULL_REDIS_HOST: redis # QUEUE_BULL_REDIS_PORT: 6379 # N8N_ENCRYPTION_KEY: ${N8N_ENCRYPTION_KEY} # GENERIC_TIMEZONE: ${GENERIC_TIMEZONE} # N8N_AI_ENABLED: true # N8N_AI_OPENAI_DEFAULT_BASE_URL: http://model-runner.docker.internal/engines/llama.cpp/v1 # N8N_AI_DEFAULT_MODEL: ${N8N_AI_DEFAULT_MODEL} # EXECUTIONS_MODE: queue # volumes: # - n8n_data:/home/node/.n8n # - ./shared:/data/shared # depends_on: # postgres: # condition: service_healthy # redis: # condition: service_healthy # command: n8n worker volumes: postgres_data: redis_data: n8n_data:Step 5: Environment Configuration
Create a .env file with your configuration:
# Generate a secure encryption key openssl rand -hex 32 # Database Configuration POSTGRES_DB=n8n POSTGRES_USER=n8n POSTGRES_PASSWORD=n8n_password_change_me # n8n Configuration N8N_ENCRYPTION_KEY=your_generated_32_char_hex_key_here N8N_HOST=localhost GENERIC_TIMEZONE=America/New_York # AI Model Configuration N8N_AI_DEFAULT_MODEL=ai/llama3.2:3B # Security Note: Change these default passwords! # For production: Use strong, unique passwordsImportant: Always change the default passwords and generate a unique encryption key!
Step 6: Launch the Stack
Start all services:
# Start all services in detached mode docker compose up -d # Check service status docker compose ps # View logs docker compose logs -f n8n # Check specific service logs docker compose logs postgres docker compose logs redisStep 7: Initial Setup
- Open your browser and navigate to http://localhost:5678
- Create your admin account when prompted
- Complete the initial setup wizard
Step 8: Test Your AI Setup
Let's create a simple workflow to test the AI integration:
Basic AI Test Workflow
- Create a new workflow in n8n
- Add a Manual Trigger node
- Method: POST
- URL: http://model-runner.docker.internal/engines/llama.cpp/v1/chat/completions
- Headers: Content-Type: application/json
- Body:
- Execute the workflow and verify you receive an AI response

Add an HTTP Request node with these settings:
{ "model": "ai/llama3.2:3B", "messages": [ { "role": "user", "content": "Hello! Please introduce yourself and explain what you can do." } ], "max_tokens": 150, "temperature": 0.7 }Using n8n AI Nodes
For more advanced scenarios, you can use n8n's built-in AI nodes:
- OpenAI Chat Model node (configured with local endpoint)
- AI Agent node for complex reasoning
- Text Classifier node for categorization
- Information Extractor node for data extraction
Step 9: Complete Stack Testing - All Three Components
Now let's verify that all three components (n8n + Model Runner + Docker MCP Toolkit) work together harmoniously. Save the comprehensive testing script below as complete-stack-test.sh:
# Download and run the complete stack test curl -O https://raw.githubusercontent.com/ajeetraina/n8n-model-runner/main/performance-test-mcp.sh chmod +x performance-test-mcp.sh ./performance-test-mcp.shThis script will:
- ✅ Test n8n health and API connectivity
- ✅ Verify Model Runner API and AI inference
- ✅ Check MCP Toolkit and GitHub integration
- ✅ Create integration workflow using all three components
- ✅ Performance test the complete stack
- ✅ Generate comprehensive report of capabilities
Expected Output
When running successfully, you should see:
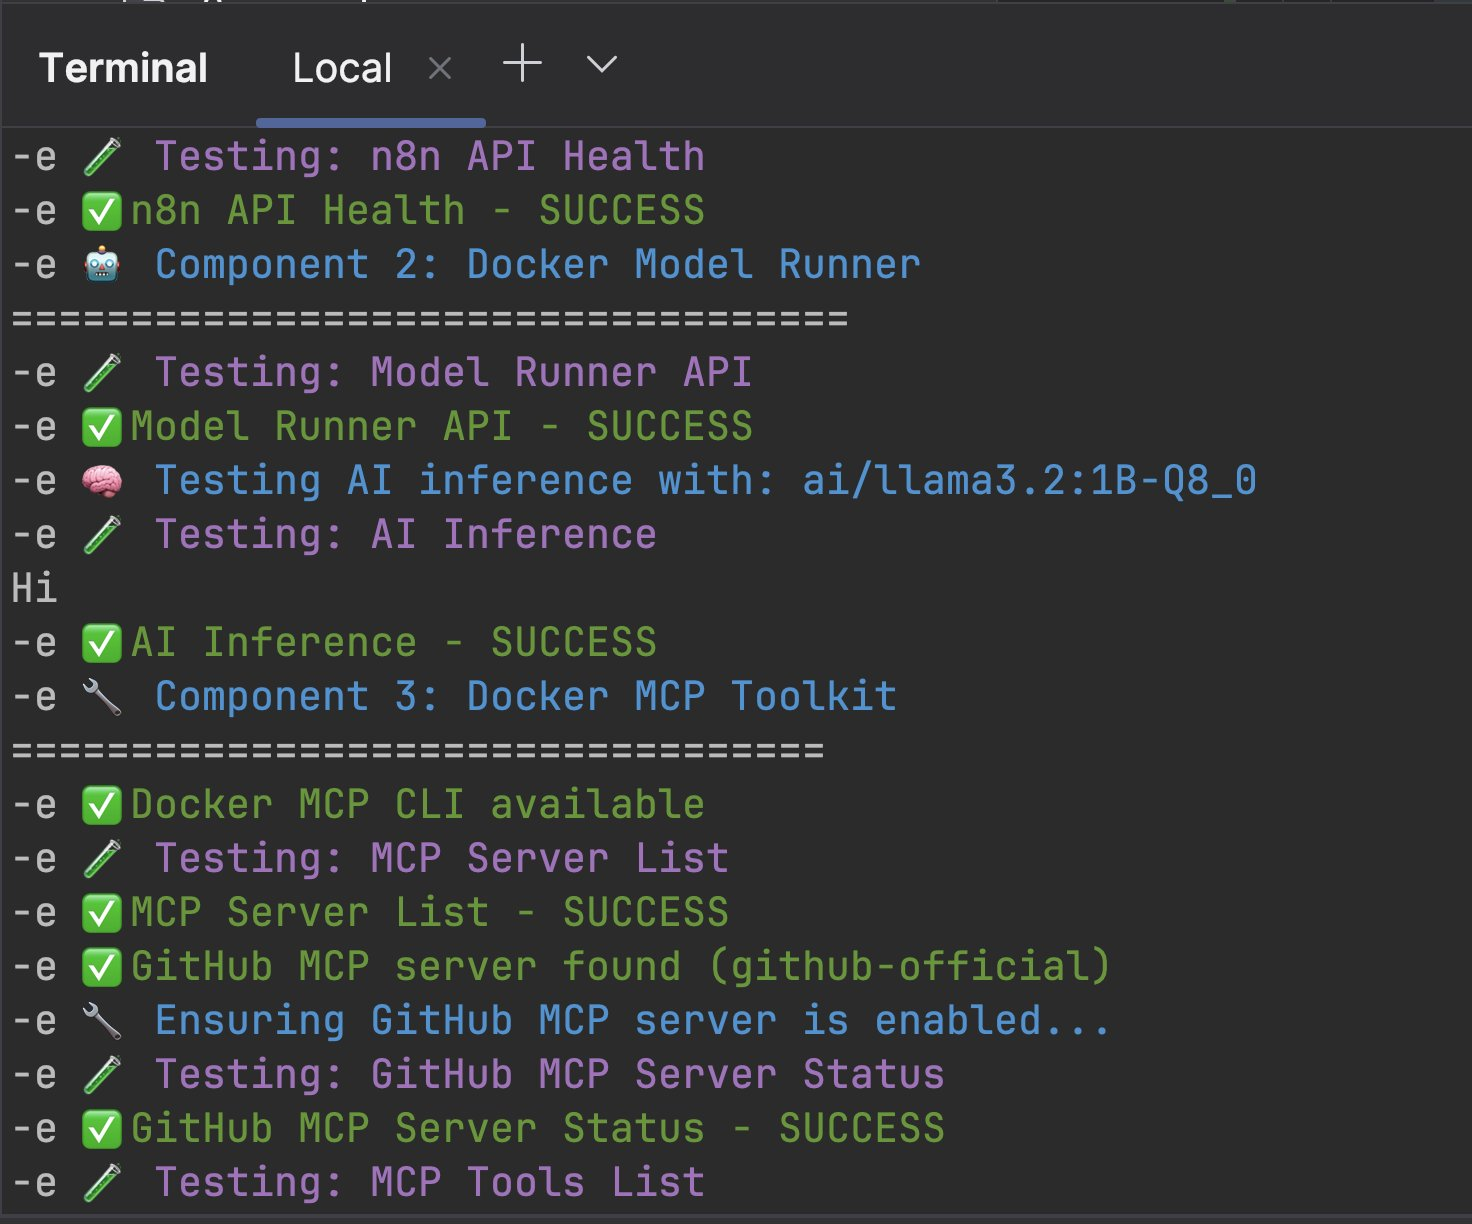
GitHub AI Workflow Testing
The script creates a complete integration workflow (complete-integration-workflow.json) that demonstrates:
Workflow Architecture:
Webhook Trigger → AI Analysis → GitHub MCP → Process ResultsWhat it does:
- Receives repository name via webhook
- Analyzes repository using local AI model
- Fetches GitHub data via MCP toolkit
- Processes and combines results
- Returns intelligent insights about the repository
Import the workflow:
- Open n8n at http://localhost:5678
- Click Import from File
- Select complete-integration-workflow.json
- Activate the workflow
Test the workflow:
# Test the complete GitHub AI workflow curl -X POST http://localhost:5678/webhook/complete-demo \ -H "Content-Type: application/json" \ -d '{"repo_name": "ajeetraina/n8n-model-runner"}'This will trigger the workflow and return AI-powered analysis of the repository!
Useful Resources
- n8n Documentation
- n8n Community Forum
- Docker Model Runner Documentation
- Docker MCP Toolkit Guide
- Model Context Protocol Specification
- GitHub MCP Server Documentation
Community and Support
- Join the n8n Community Forum for discussions and support
- Follow @n8n_io on Twitter for updates
- Check out the n8n GitHub repository for source code and issues
Conclusion
You now have a complete local AI automation platform that leverages the best of both worlds: n8n's powerful workflow capabilities running in containers, and AI models running natively on your host for optimal performance!
The combination of n8n's containerized workflow engine and Docker Model Runner's host-native AI inference creates a powerful platform for building intelligent automation workflows while maintaining complete control over your data and infrastructure. Whether you're processing customer emails, analyzing documents, or creating content, this local AI stack provides the power and flexibility you need.
Start building your first AI-powered workflow today, and discover the potential of local AI automation with the performance benefits of native execution!


