.png)

This is where most fitted sheet tutorials start. Hopefully my "First Person Folder" drawings give these instructions a unique twist. If it helps, you can imagine you are in hand-to-hand combat with a cloth demon.
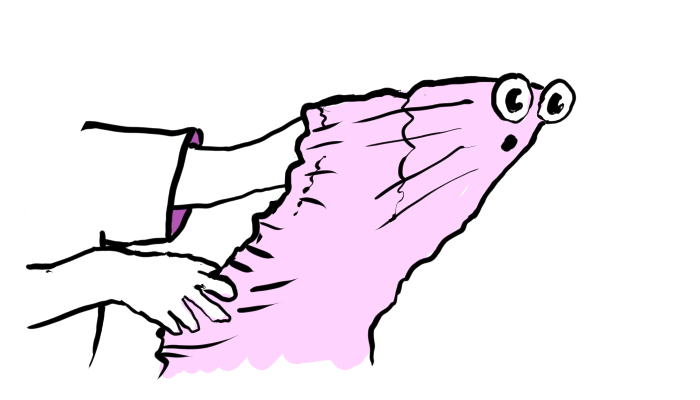
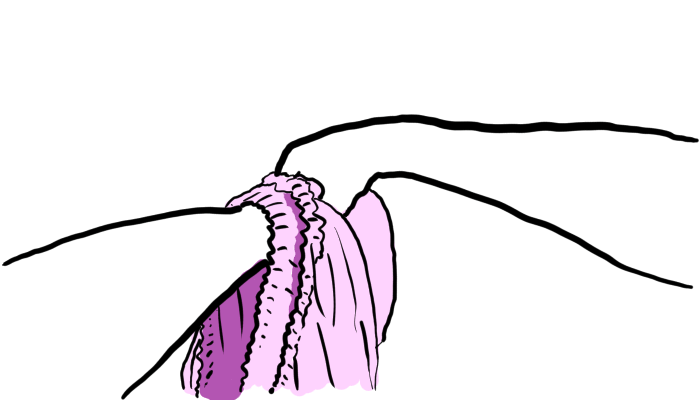
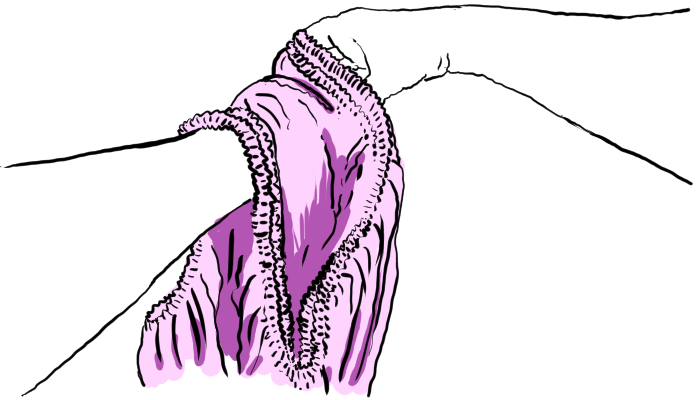
It begins by locating a corner and putting it on an outstretched hand. So let’s do that.
Put your hand in a corner
The face may or may not appear. But know that it’s there. You’ve got your creature in hand now.
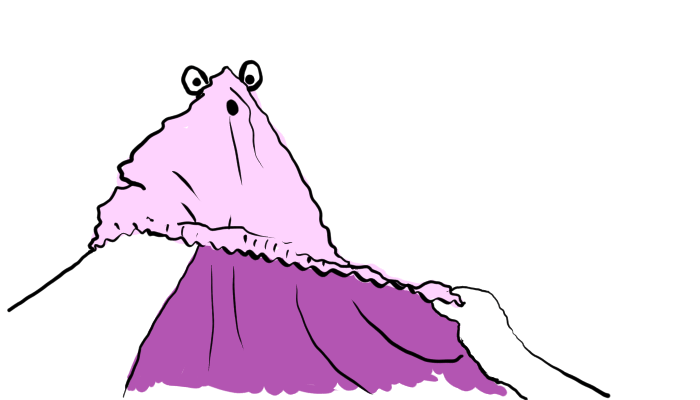
Which way should the sheet be facing? Some sheets have a printed pattern on one side, which will look better on the outside of your final folded bundle.
To achieve that, have these first corners inside-out. After you put the first corner with the second one, the sheet will become right-side-out and remain that way for the rest of the folding.
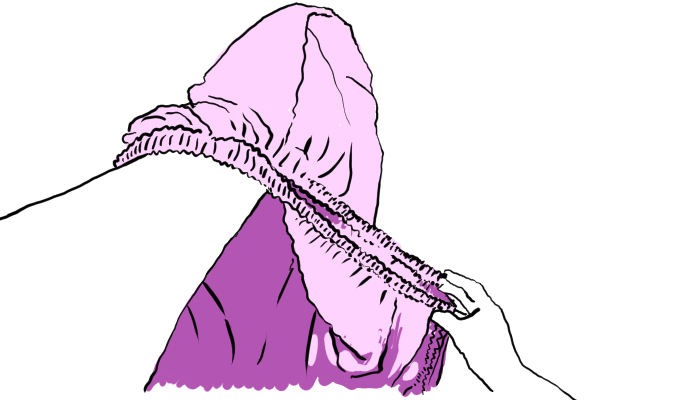
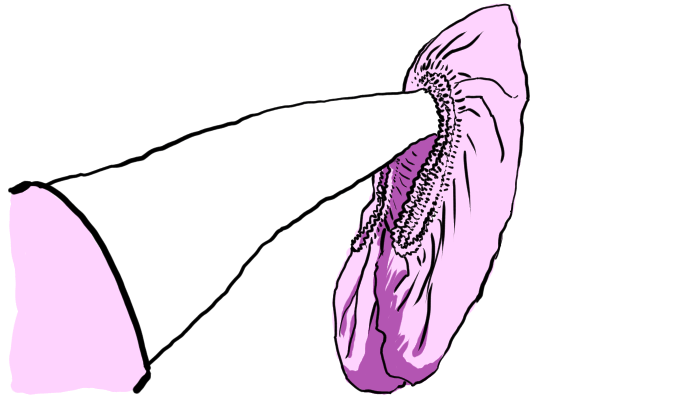
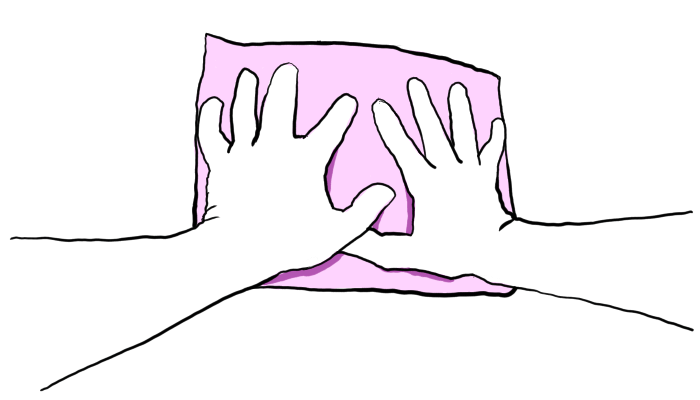
Your free hand goes into the other corner
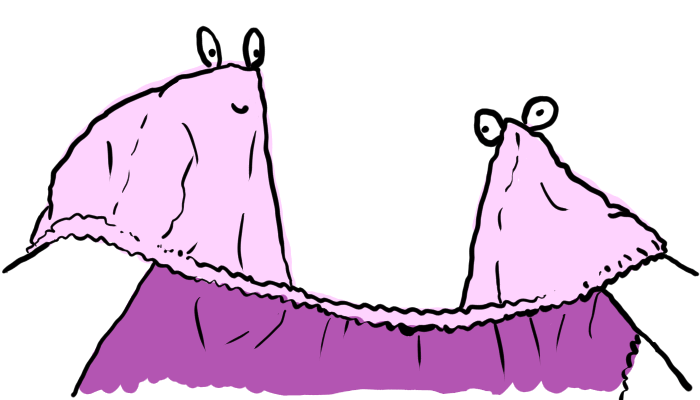
Now you have two creatures! Hello creatures.
Note that for the step above, you can go to either the corner to your left or right and it doesn’t matter which hand you start with. Do whatever feels most comfortable and natural.
Just make sure you don’t grab a diagonal corner or somehow twist the sheet in getting that second corner. If you’ve got something that looks like my drawing with two hands in two corners, you’re good to go.
Also, do we have any Sesame Street fans in the house? Doesn’t the corner on the right look like one of the "Yip Yip Martians" from Sesame Street? I loved those little aliens.
Make them kiss!
Touch the tips of the corners together.
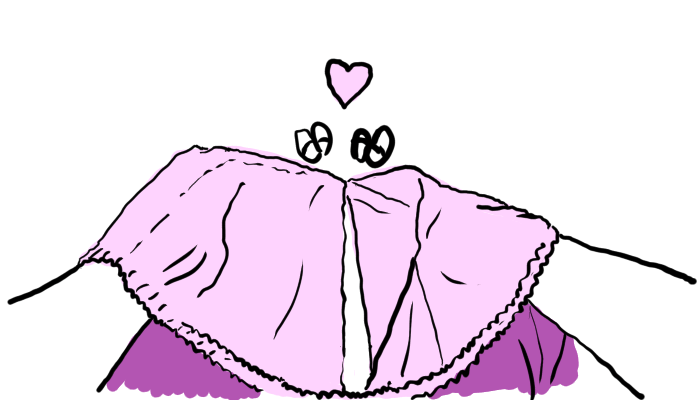
Aw, how sweet. (Did the heart appear for you too?)
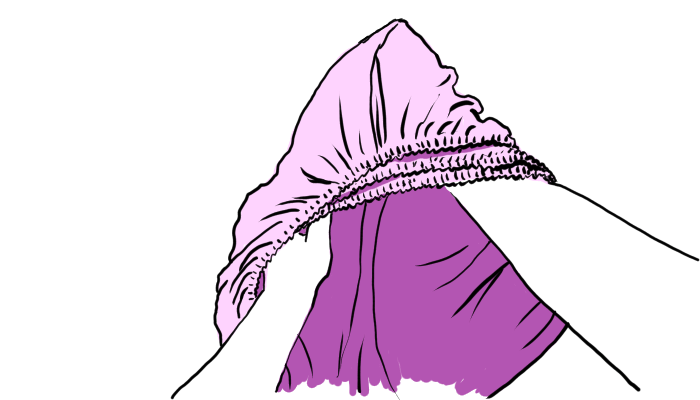
Cover the first corner with the second
Invert one corner over the other, keeping the tips of the corners together.
The result is that one hand ends up in the pocket of both corners. The other hand is free for action once again.
Okay, the next part is where everybody usually gets mixed up and frustrated. (And I believe I know why. Check out the What I do NOT recommend section below to read about that.)
I think I’ve figured out a fool-proof way of explaining this. I certainly ended up making way more drawings than I’d originally planned with the hopes of getting it across. But when it’s all said and done, this is still just a series of two-dimensional drawings and text. It’s not telepathy. So we’ll need to work together to make this happen.
Ready?
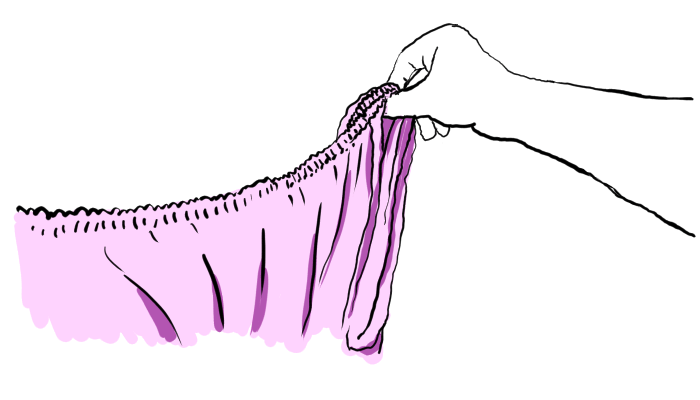
Find the other two corners
With your free hand, grab the two elastic edges and trace them along until you reach the other two corners.
Get the other pair of corners ready
Try to roughly line up the seams of the corners. The elastic makes everything all bunched up and hard to see, so perhaps try stretching it out a bit to get a better lay of the land.
Seriously, take your time with this part. Really focus on what you’re doing with this hand. Get into it.
Tip: Shaking the sheet occasionally between steps can help the cloth fall straight and make it a little more manageable and understandable.
Pop that second pair of corners
Get your hand into that second pair of corner pockets.
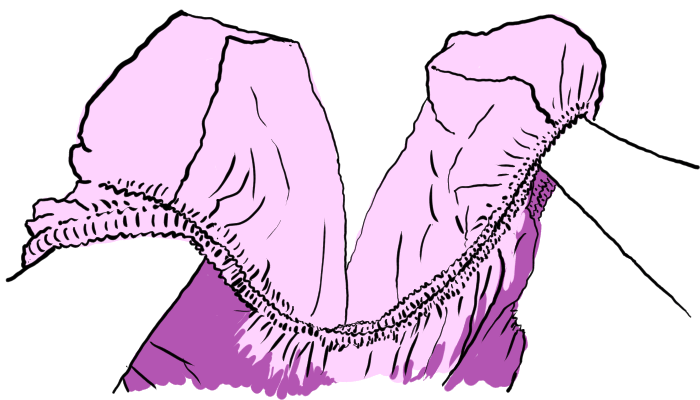
The goal here is to have both hands mirroring each other in a pair of pockets, with the rest of the sheet between them, not twisted. It should look roughly like the drawing above.
Line up the corners, prepare for contact!
Line them up like jousting combatants. Corner pointed at corner. Hot sun overhead. Pennants snap in the wind. A hoofbeat on the sod. Here we go…

Touch corner to corner. And then…
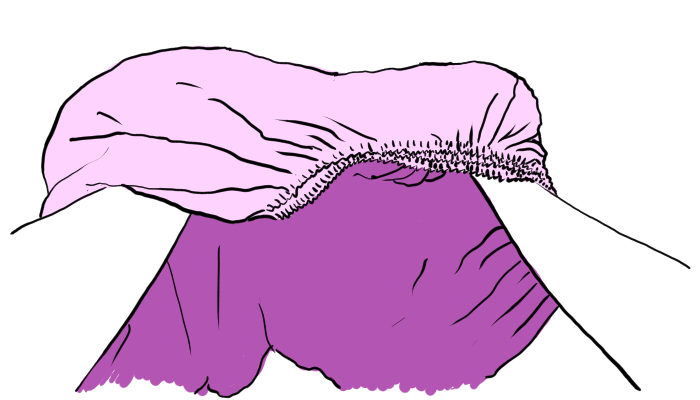
Cover the first corner pair with the second corner pair
Just like when we put the first pair together, now we’re going to invert the second pair over the first.
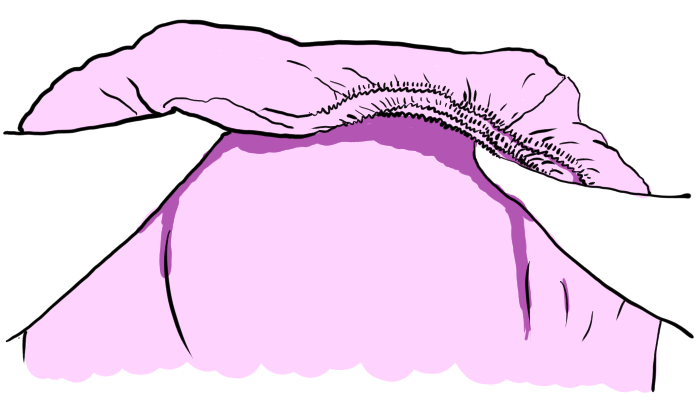
Admire your consolidated corners
The whole sheet is now on one arm, with your hand in the overlapped corner pockets. All four elastic corners overlap. The rest of the sheet hangs below.
It’s like you are holding a heavy cloak with your hand in the hood. Where did the rest of the wizard go?
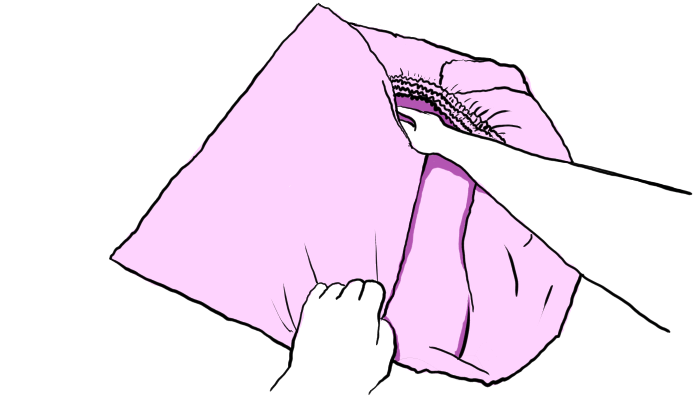
Find the inner edge
What you have now is the quarter sheet - our initial goal! But it doesn’t look like one yet. To get that square shape when you lay it flat, you’ll need to find a coherent edge.
In the drawing below, I’ve switched hands to trace the natural fold inside the sheet.
A quicker method is to get your elbow into the sheet so that your forearm makes a clothesline for the inner fold of the sheet. Describing how to do this is like trying to describe how to toss a pizza crust, so if what I wrote makes sense go for it and if not, don’t worry about it.
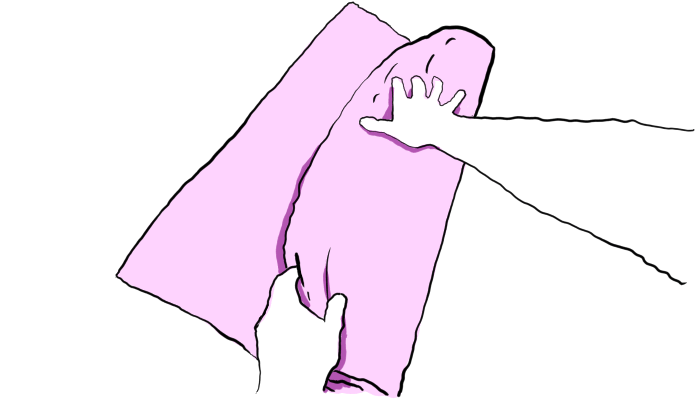
Hold your quarter sheet from the inside of an edge
You’re about to put the quarter sheet down. Make sure you have figured out at least one edge of the square that includes your hard-earned corner pocket.
Your hands will be at opposite ends inside the fold. Your arms will be under the four layers of elastic.
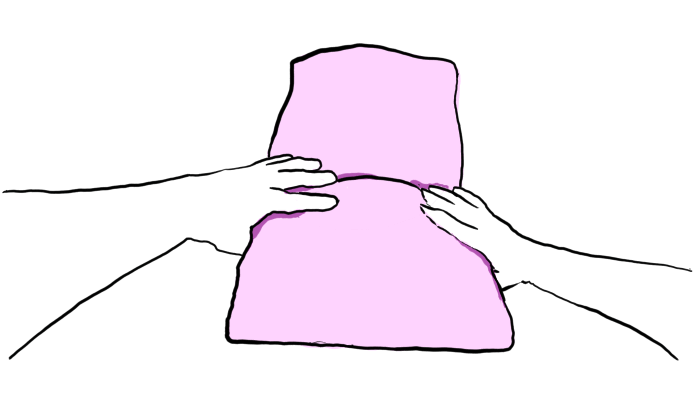
Lay the quarter sheet down, straighten and flatten
At last, you can lay the quarter sheet on a flat surface. It’s not too big anymore!
Get it reasonably straight. But only reasonably!
(Yes, you can adjust by pushing the inner corners and tugging gently at the outsides. But keep in mind that the elastic pulls the fabric out of square, so it’s completely unreasonable to try to get four perfect 90 degree angles. Don’t even try!)
Your chance to get genuine straight edges is next.
Start folding!
I’ll be showing the rest of the process, but you’re really on the home stretch here. The "correct" way to fold the quarter sheet actually depends on variables such as the final desired shape and size, the dimensions of the sheet, etc.
It’s pretty safe to experiment here because the quarter sheet is relatively stable.
The important things to know:
-
These folds are your chance go get actual straight edges.
-
You’re entombing the elastic weirdness inside the folds to manage the chaos.
-
You can get it quite neat and crisp by flattening the sheet between each fold.
-
This is the devil’s origami.
Let’s finish this up. I’m doing this in thirds because that worked out pretty well for my sheet and thirds guarantees the rough outer edges end up inside the bundle.

The final bundle will probably resemble a pillow to some degree. The elastic is bulky and there’s no way around that short of squashing it flat in a hydraulic press.
When you put it on a shelf, put the neatest edge facing out and stack some other stuff on it and it’ll look totally professional. Way to go!
All illustrations made by the author with Krita.


